Uploading Files
Getting documents into Judicio is straightforward, and once they're in, the File Library does the work for you — OCR, entity extraction and an AI summary on every file, then a proposed folder structure for the whole set. The looping demo below shows the full flow; the steps beneath it break it down, button by button.
- A Judicio account with an active subscription or free trial
- A project to upload into (create one from the Projects page)
- Enough credits for the pages you'll process — processing costs
pages x 0.5credits per file. Your balance is shown in the top bar. See Credits Explained.
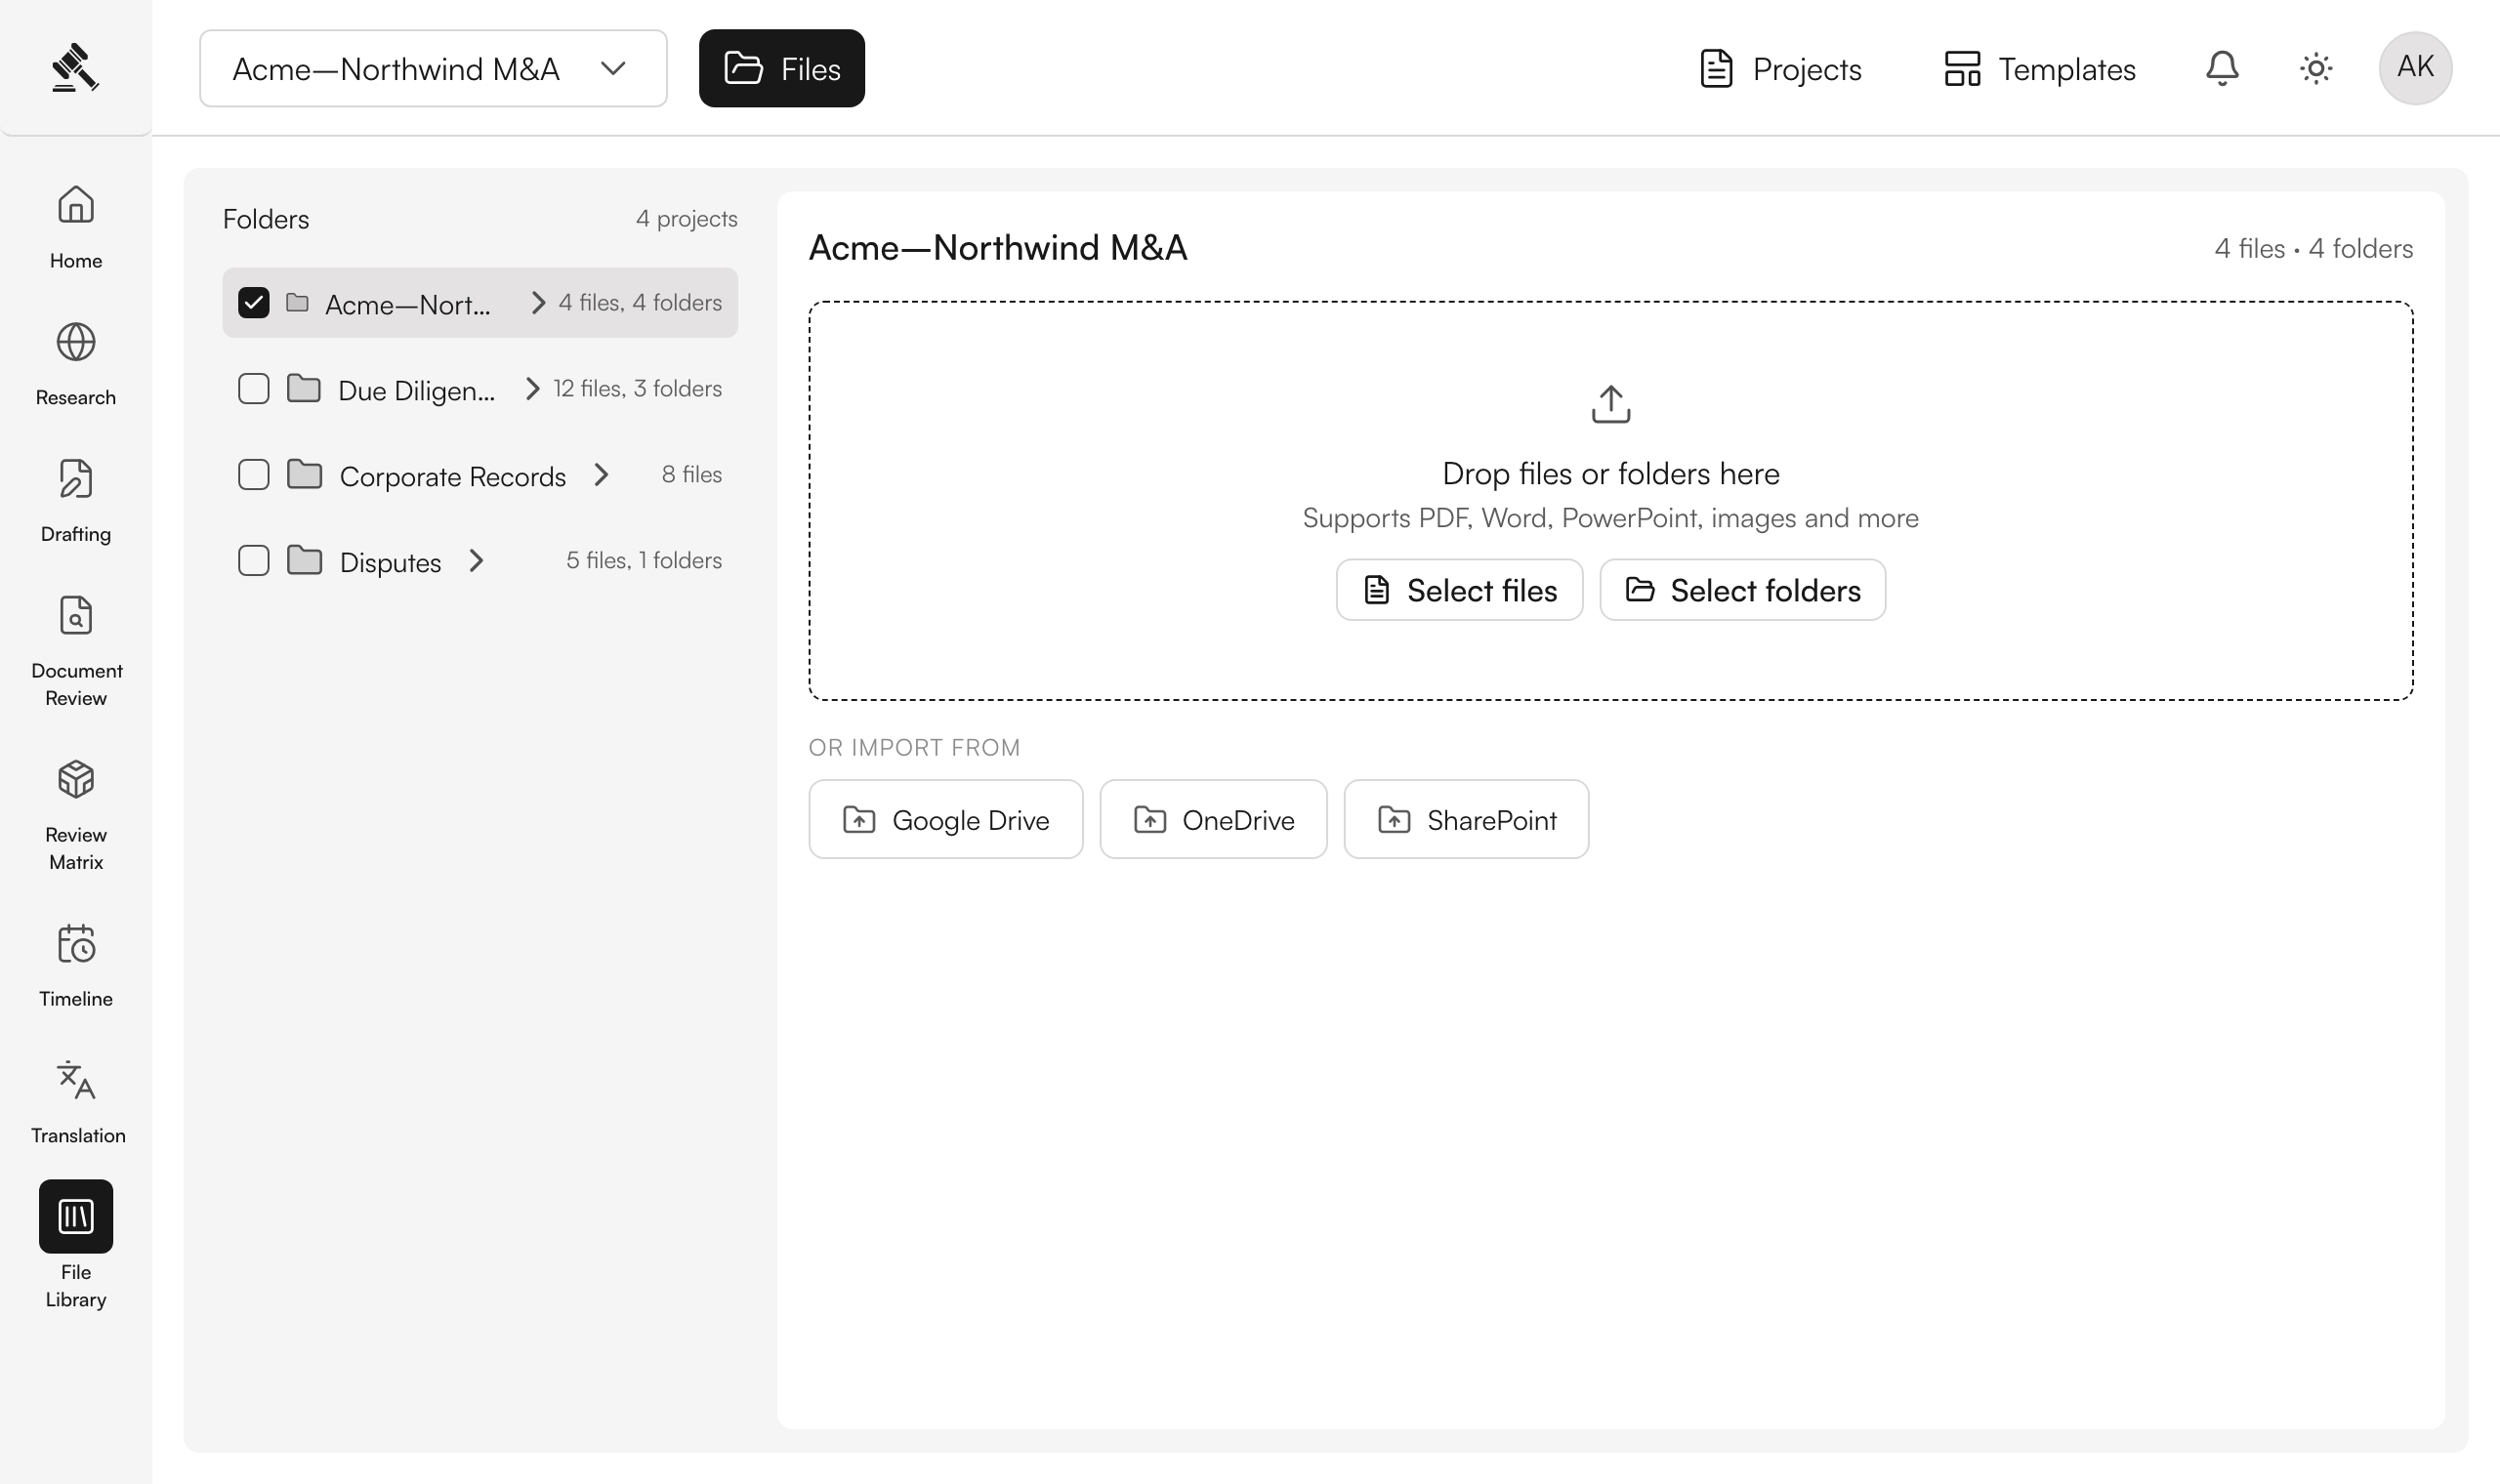
Add your files
Open your project and go to the File Library. Add documents using any of these:
- Drag and drop — drag files or whole folders from your computer onto the drop zone. It highlights when Judicio detects your files.
- Select files / Select folders — open the OS picker and choose one or more files, or an entire folder tree.
- Import from cloud — pull documents straight from Google Drive, OneDrive or SharePoint without downloading and re-uploading. See Cloud Import.
You can upload many files at once — Judicio processes a batch in parallel, so 20 documents isn't dramatically slower than one.
| Format | Extension | Notes |
|---|---|---|
.pdf | Native PDFs, scanned PDFs, and image-based PDFs are all supported. Scanned pages are automatically OCR'd. | |
| Word Document | .docx | Microsoft Word documents. Formatting and tables are preserved during processing. |
| JPEG Image | .jpg, .jpeg | Photographs of documents or scanned pages. OCR is applied automatically. |
| PNG Image | .png | Screenshots, scanned pages, or document images. OCR is applied automatically. |
| TIFF Image | .tiff, .tif | Common format for scanned legal documents and faxes. Multi-page TIFF files are supported. |
If you have documents in other formats, convert them to PDF before uploading for the best results.
| Plan | Maximum file size | Maximum files per upload |
|---|---|---|
| Free trial | 25 MB per file | 10 files per batch |
| Professional | 100 MB per file | 50 files per batch |
| Enterprise | 250 MB per file | 100 files per batch |
Uploading a large batch? Create folders first and drop files straight into the right one, or just upload everything and let Smart Folders (step 4) propose a structure for you.
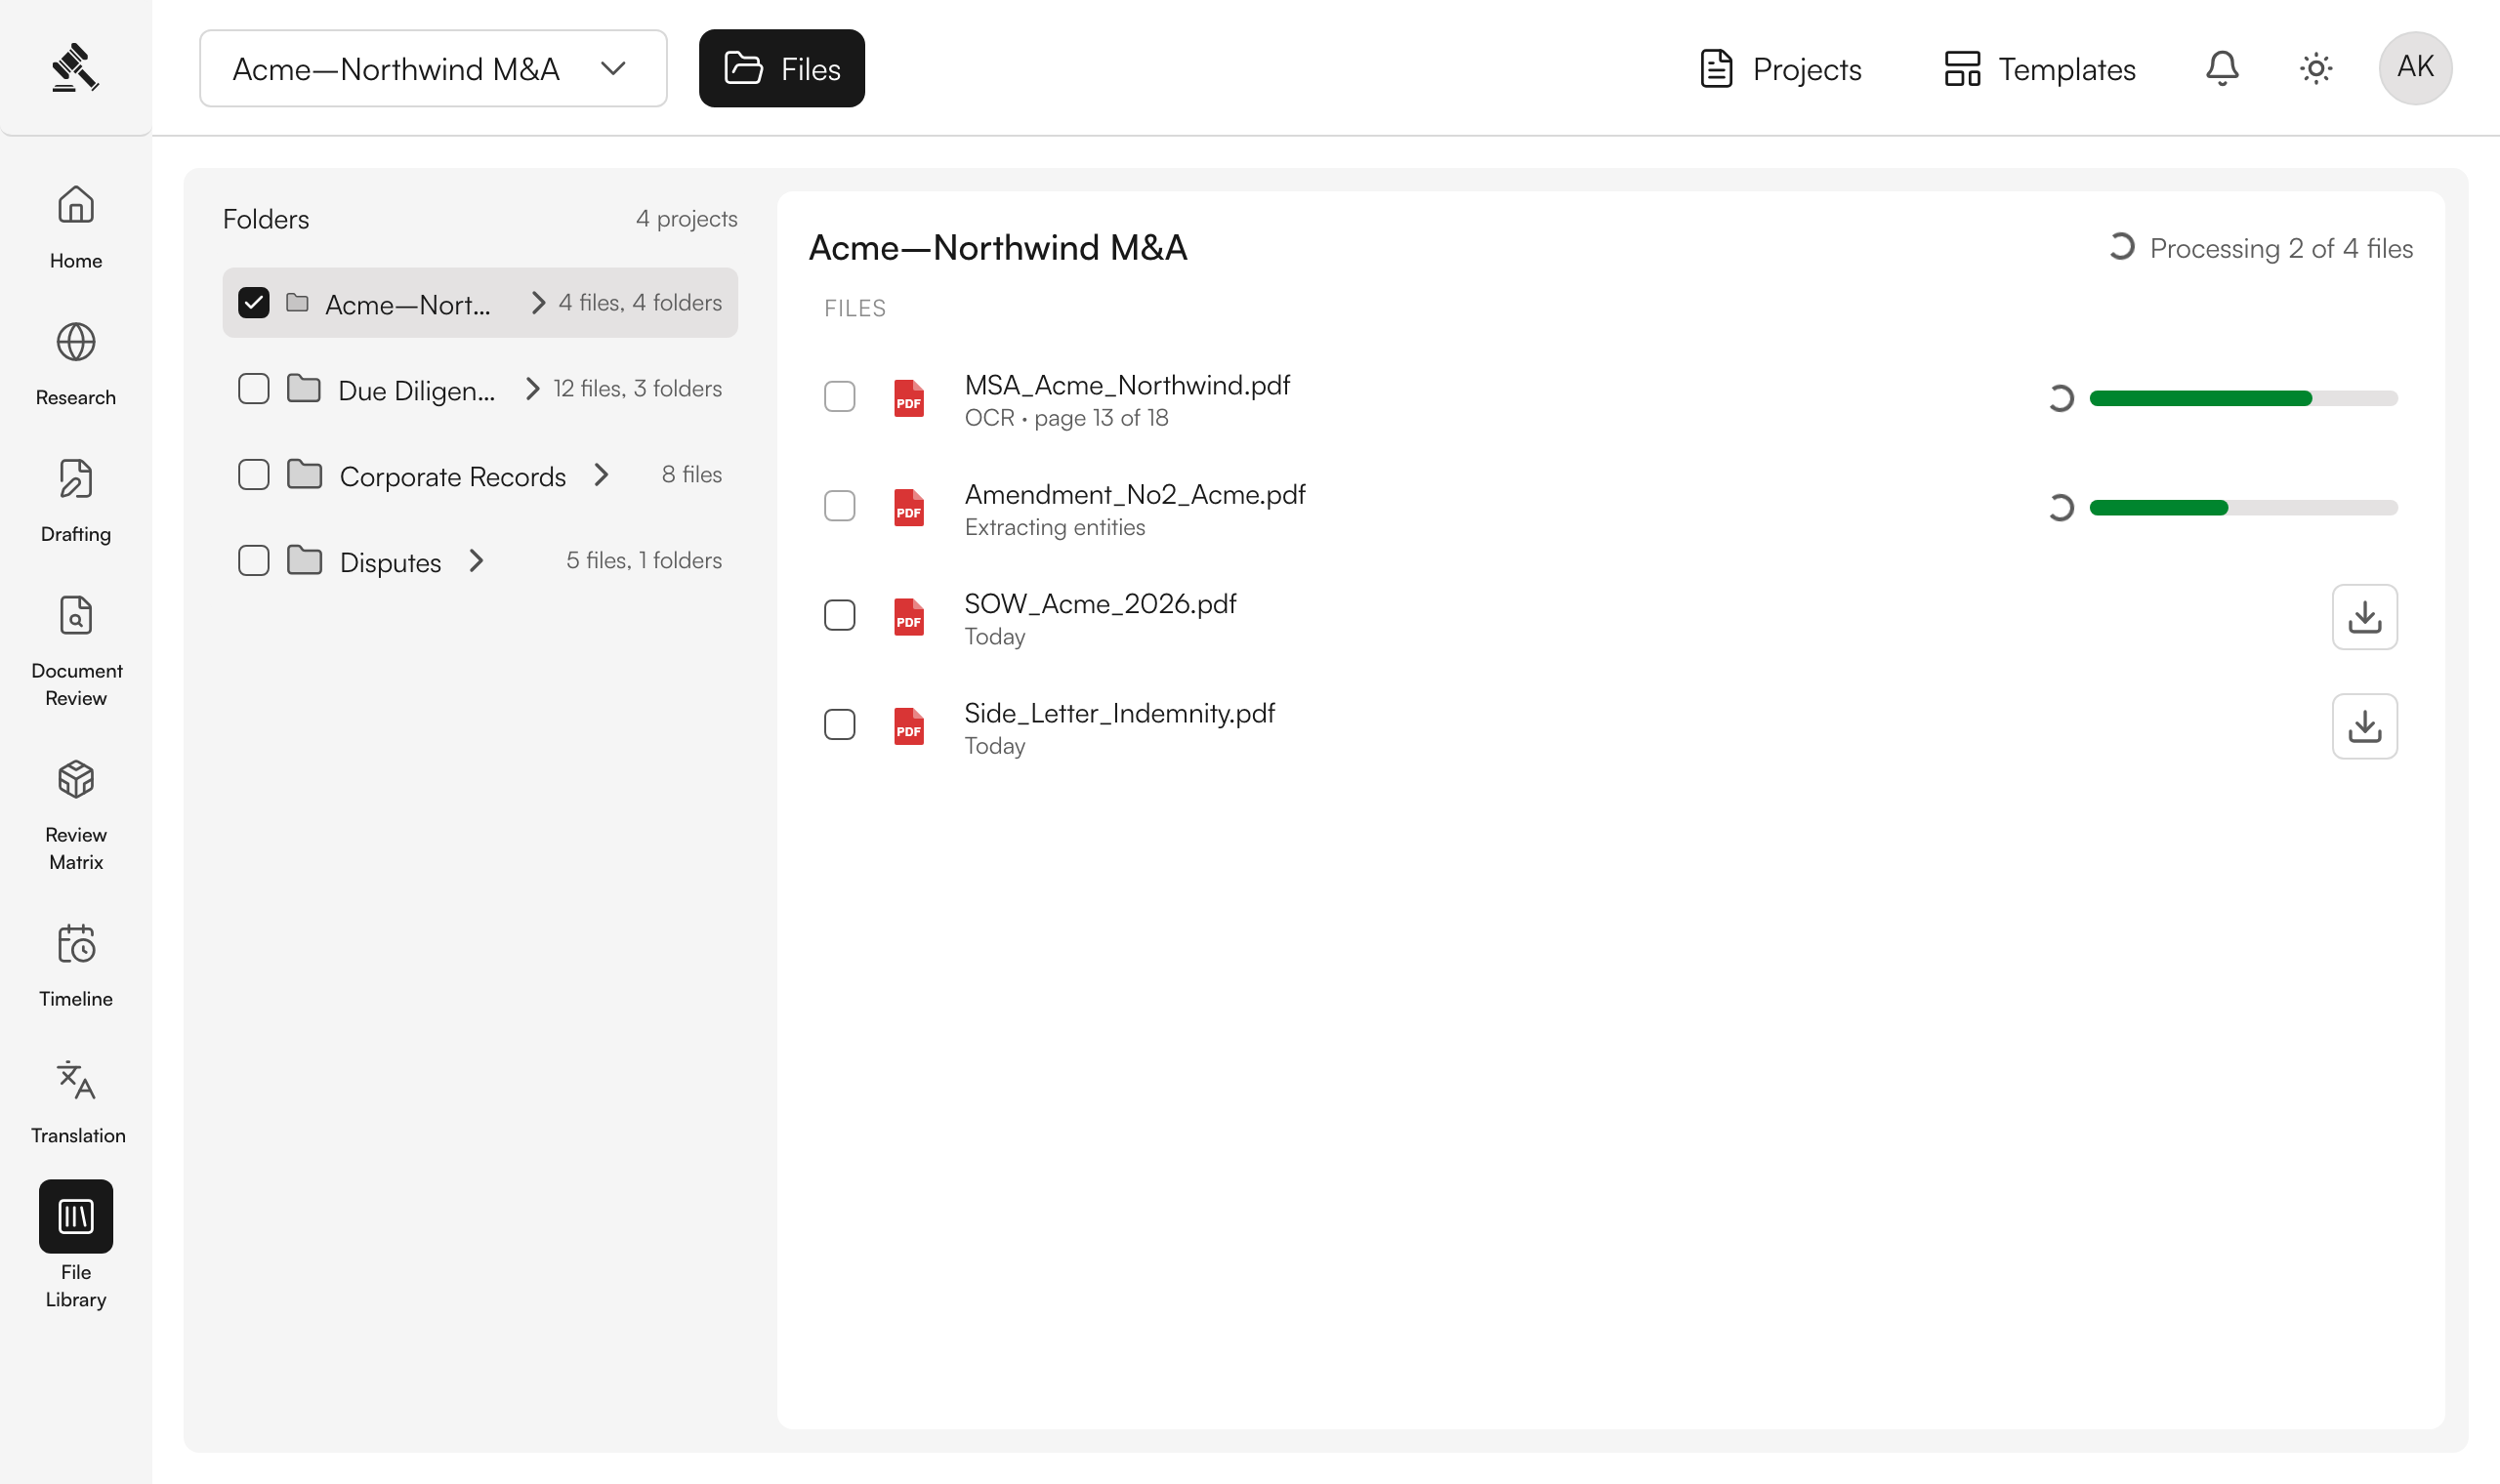
Judicio reads every file
Each file shows a live progress strip as Judicio runs its pipeline: OCR turns scanned pages into searchable text, entity extraction tags parties, dates, amounts and clauses, and an AI summary is generated. Small documents finish in under a minute; larger ones take a few minutes. You can navigate away while it runs.
Each file moves through these stages, which you can watch from the library view:
| Status | What it means |
|---|---|
| Uploading | The file is being transferred to Judicio's servers. |
| Processing | OCR, entity extraction, and summary generation are running. |
| Ready | Processing is complete. The file is fully searchable and all AI-generated data is available. |
| Error | Something went wrong during processing. Select the file for details and retry options. |
- Use native PDFs when possible — they extract more accurately than scanned images.
- Check scan quality — scan physical documents at 300 DPI or higher; low-resolution scans reduce OCR accuracy.
- Name files descriptively — file names are searchable, so "Lease Agreement - 123 Main St - 2024.pdf" beats "scan001.pdf".

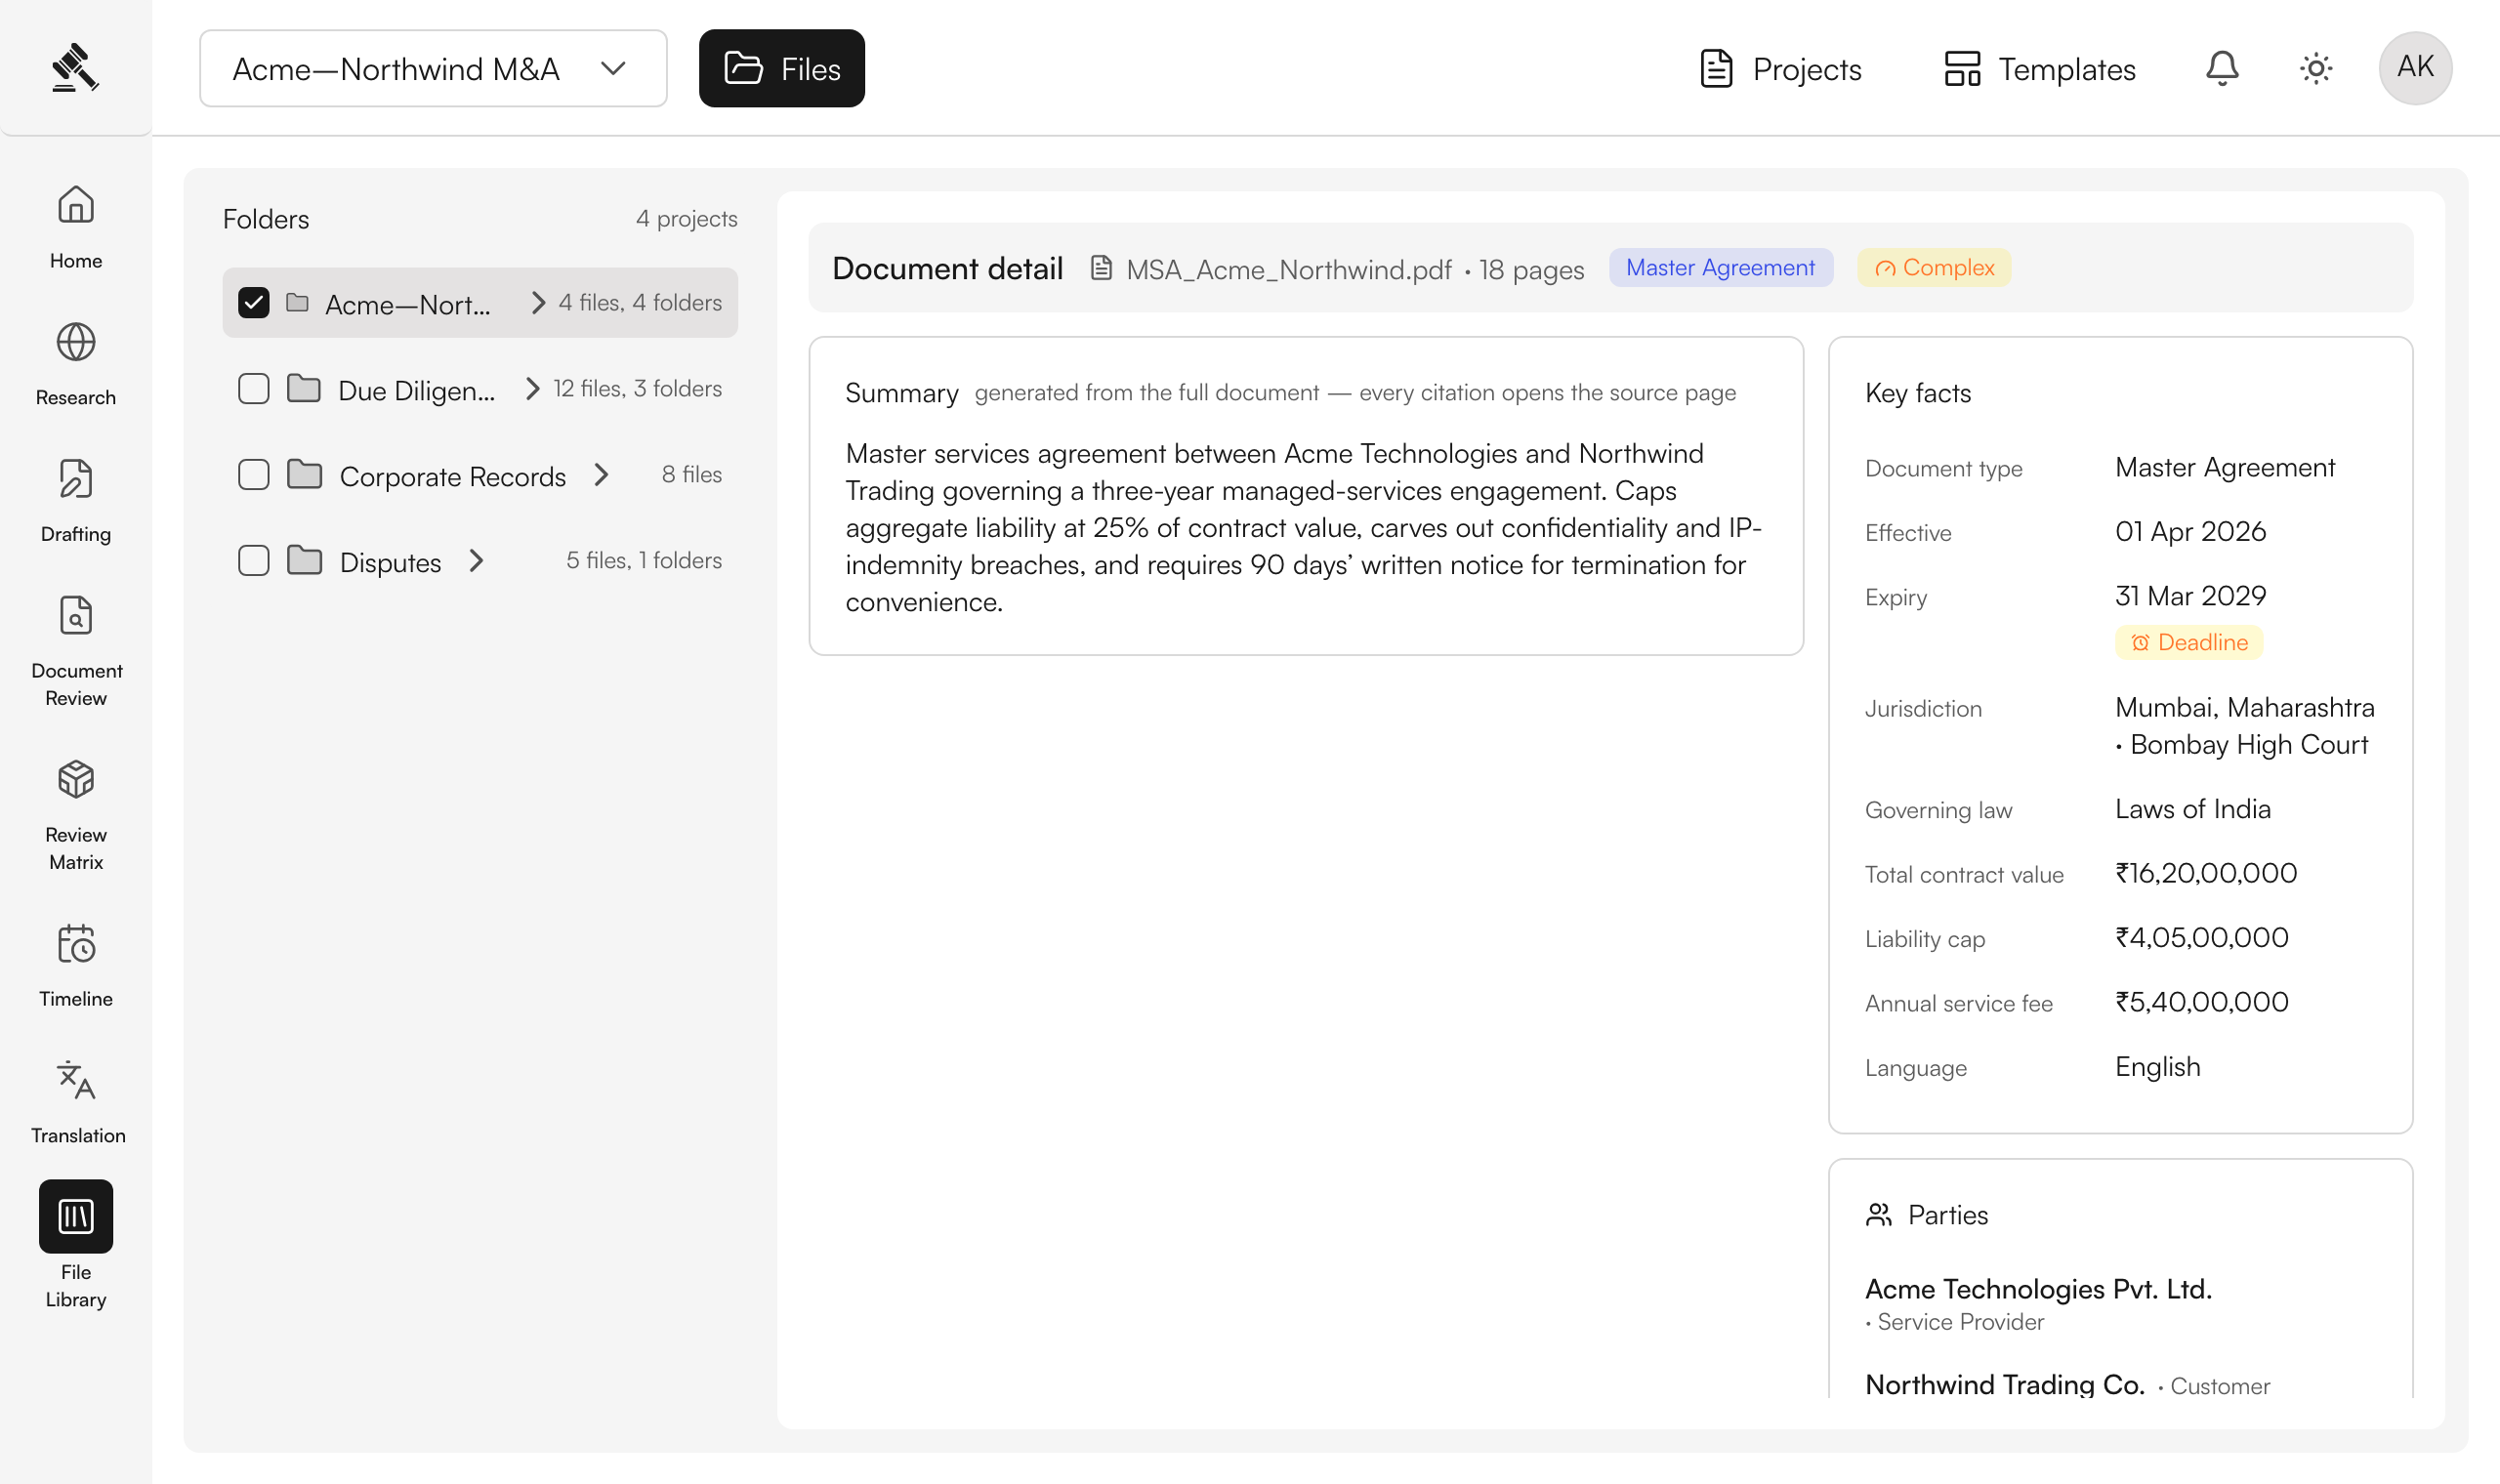
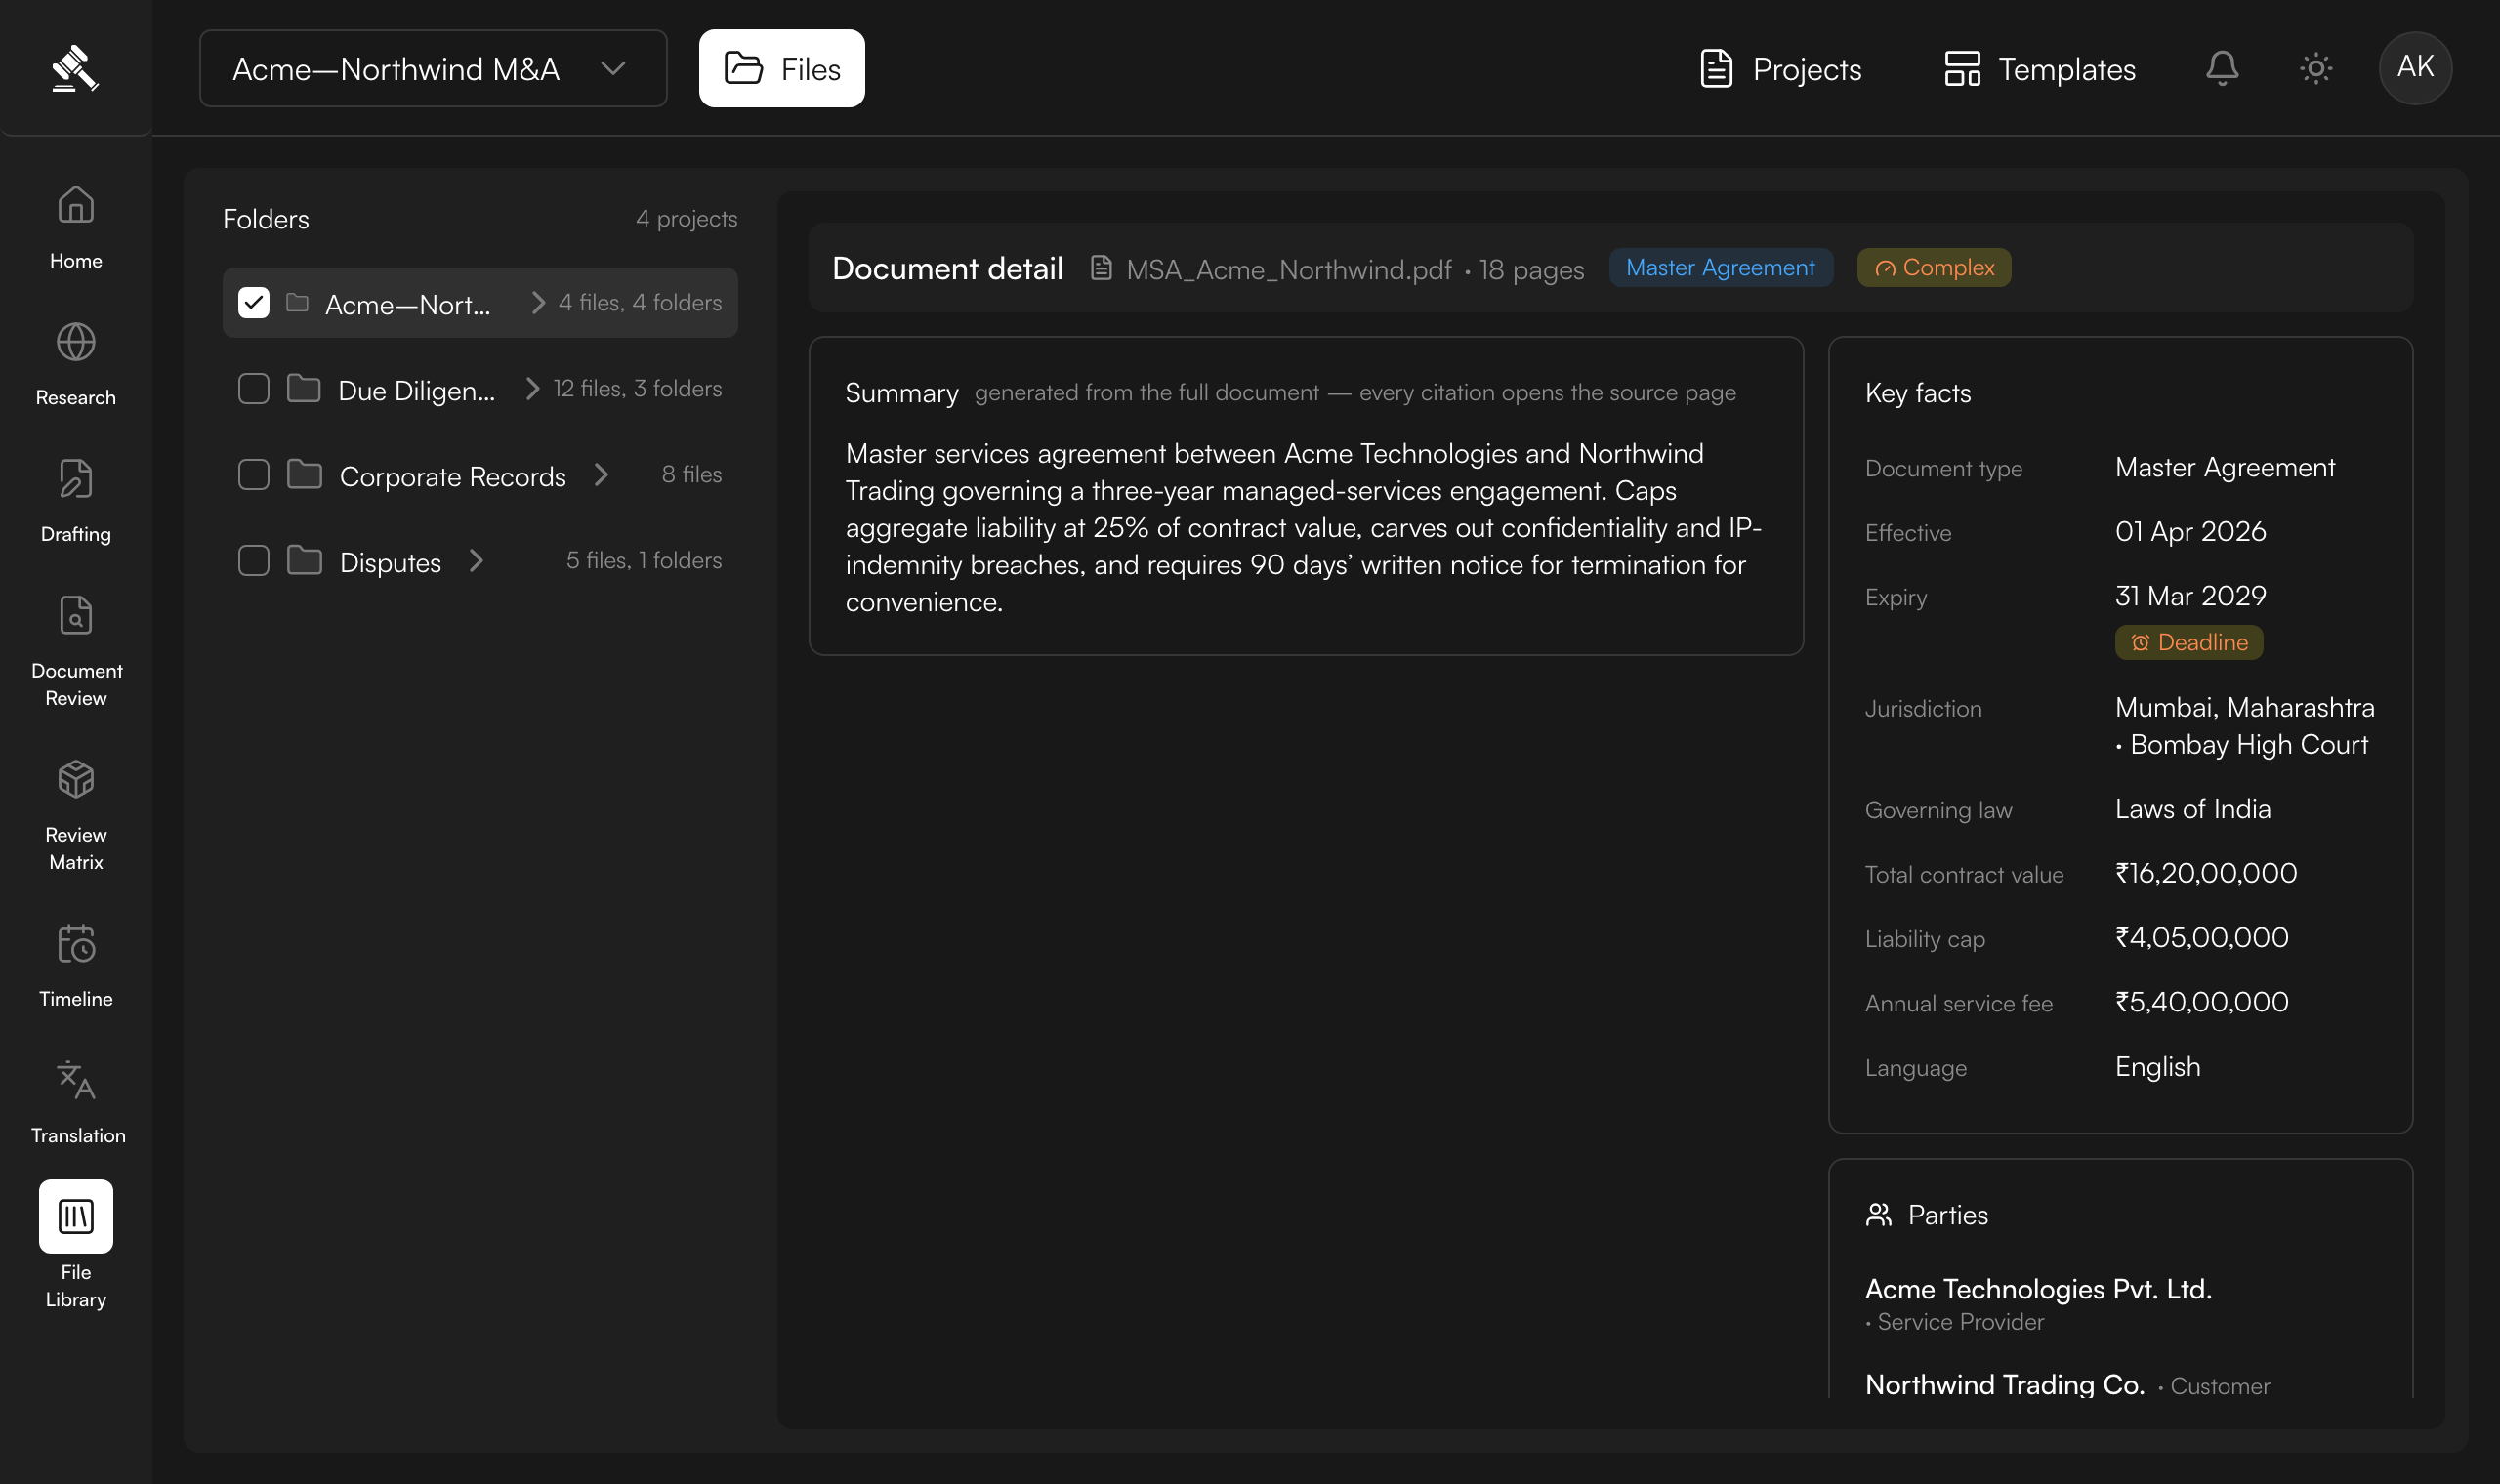
Read the extracted metadata
Open any document to see what Judicio pulled out of it — no reading required. The detail view shows the AI summary, the parties and their roles, key dates (effective and expiry, with a red 🚩 Deadline flag where it matters), the monetary values (₹ amounts, liability caps, fees), the governing law and jurisdiction, plus the document type, complexity and language.
Every fact is cited to the source page, so a click confirms it. See File Details.
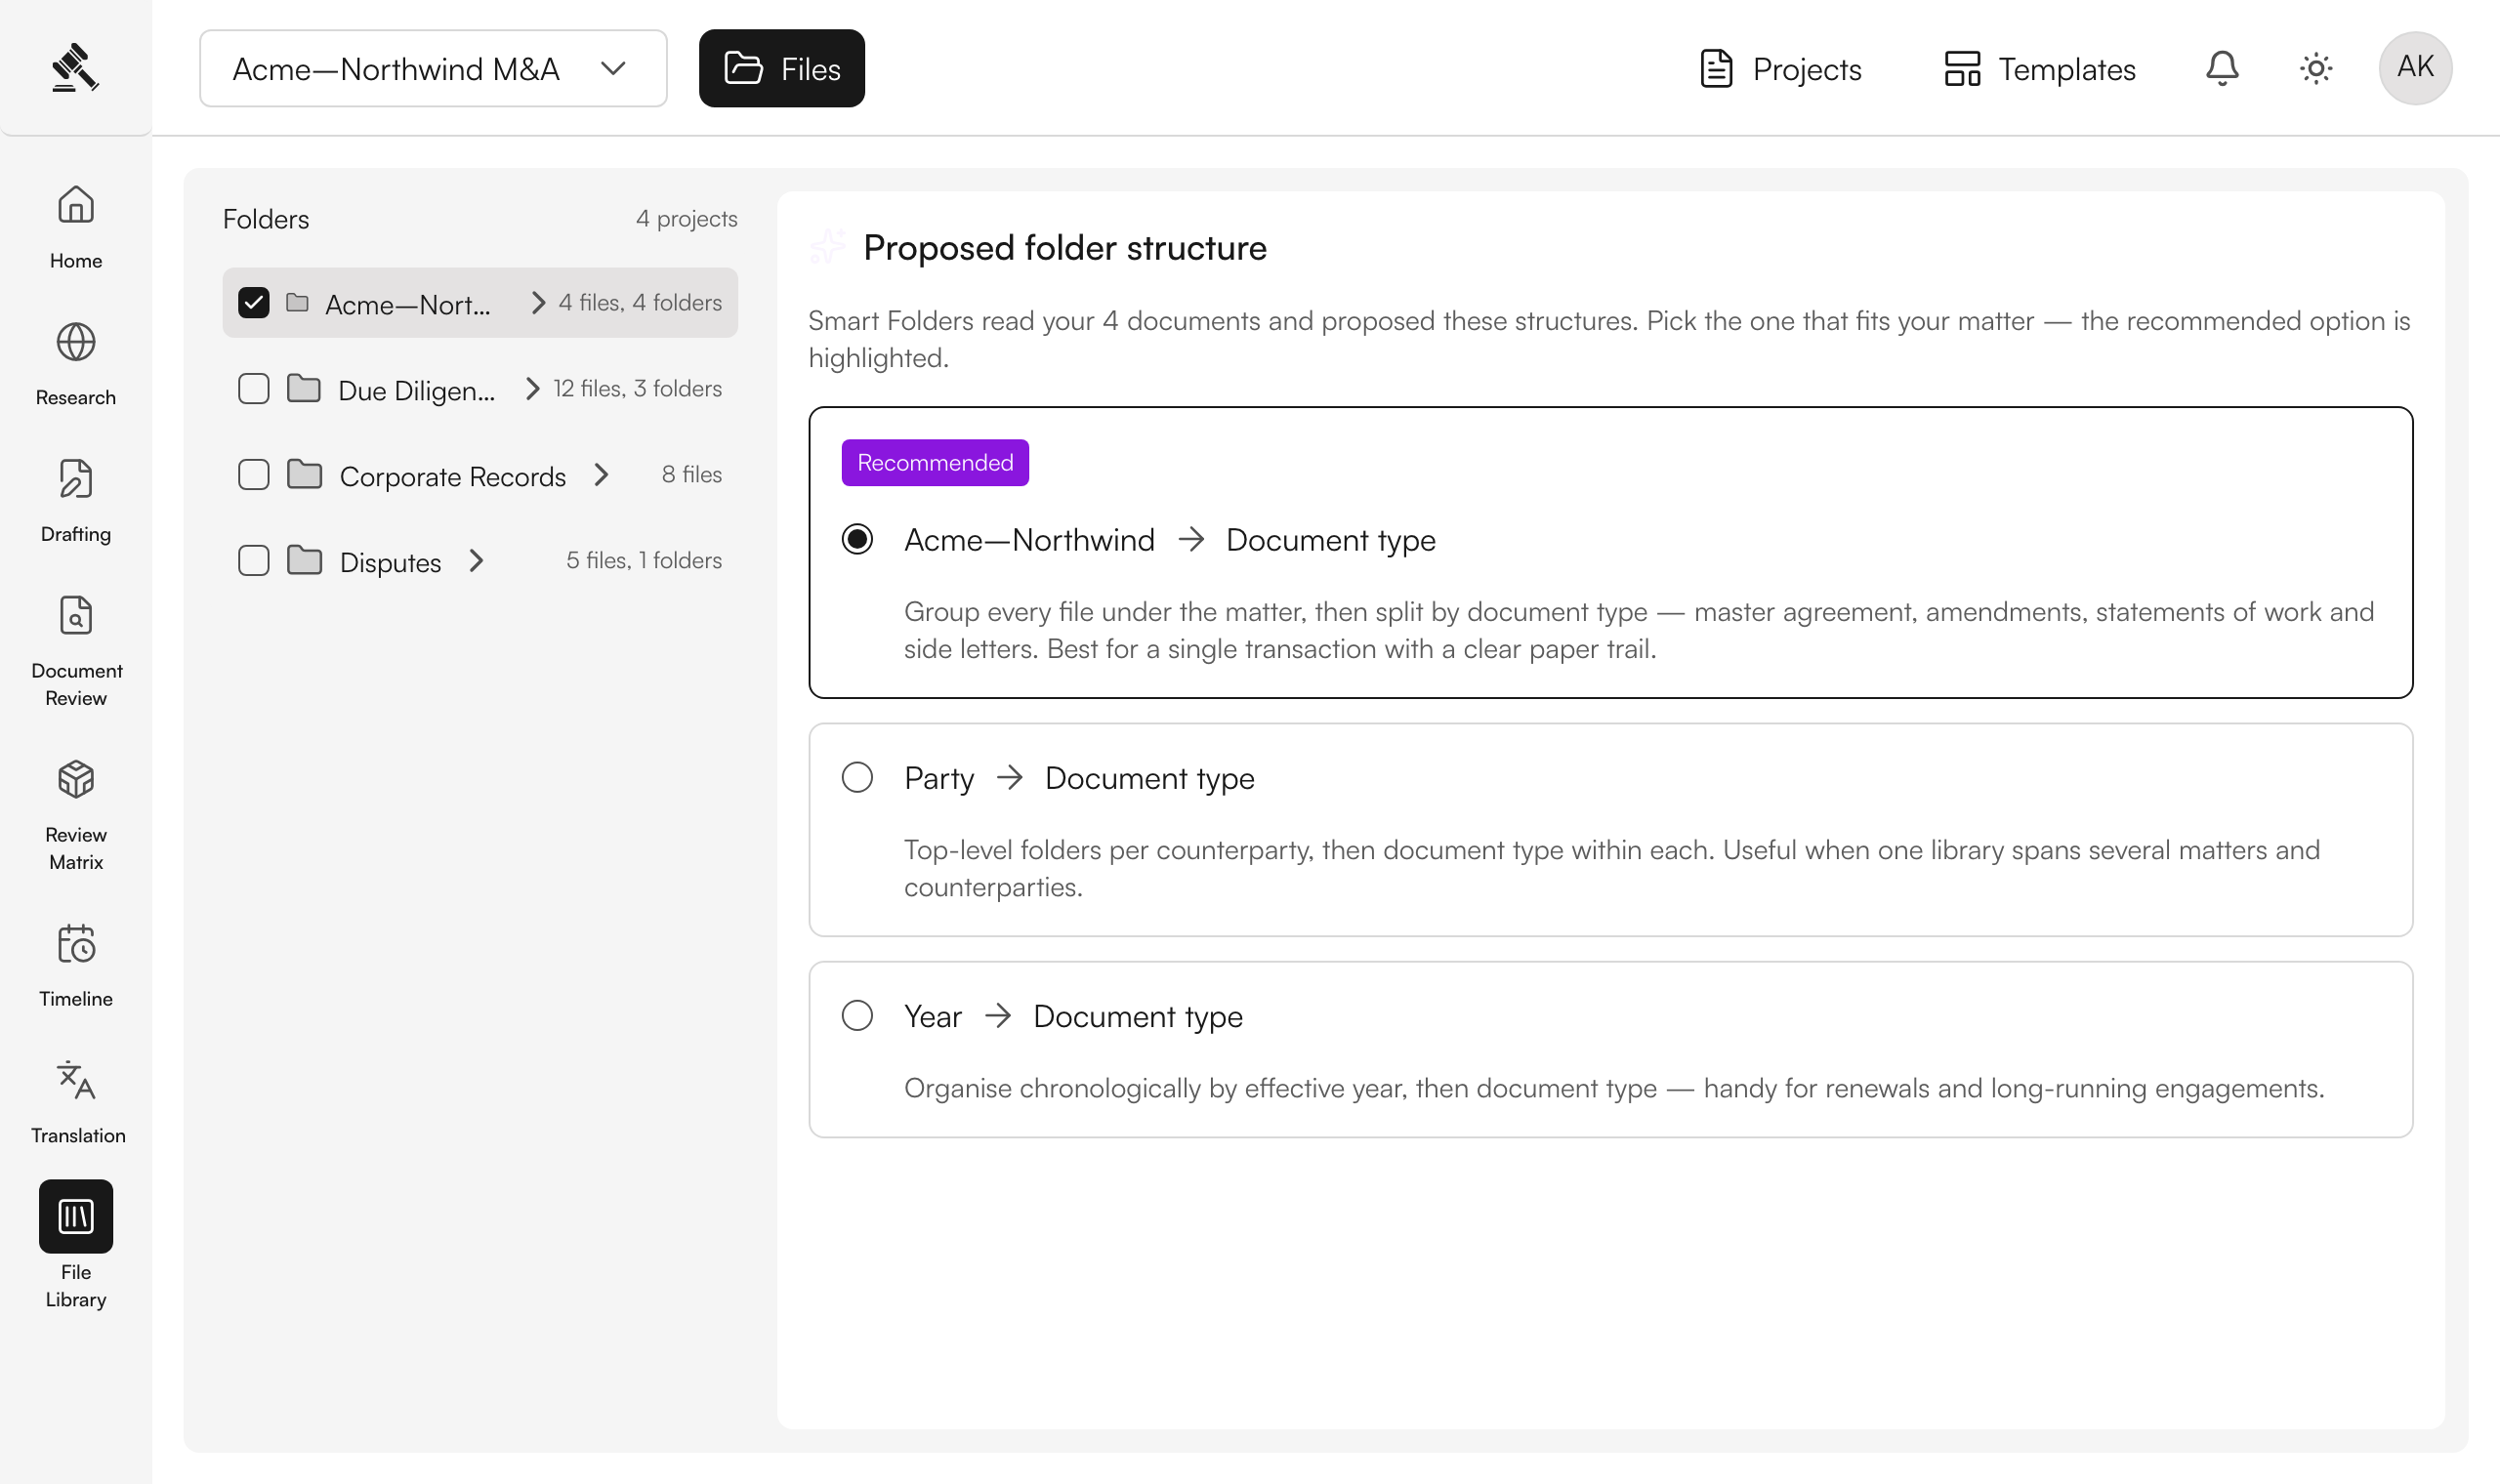
Let Smart Folders propose a structure
Select your files and open Smart Folders. Judicio reads the documents themselves and proposes a few ways to organise them — by document type, by party, or by year — each with a short description and a confidence score. The recommended option is highlighted. Pick the one that fits your matter.
See Organizing Files.
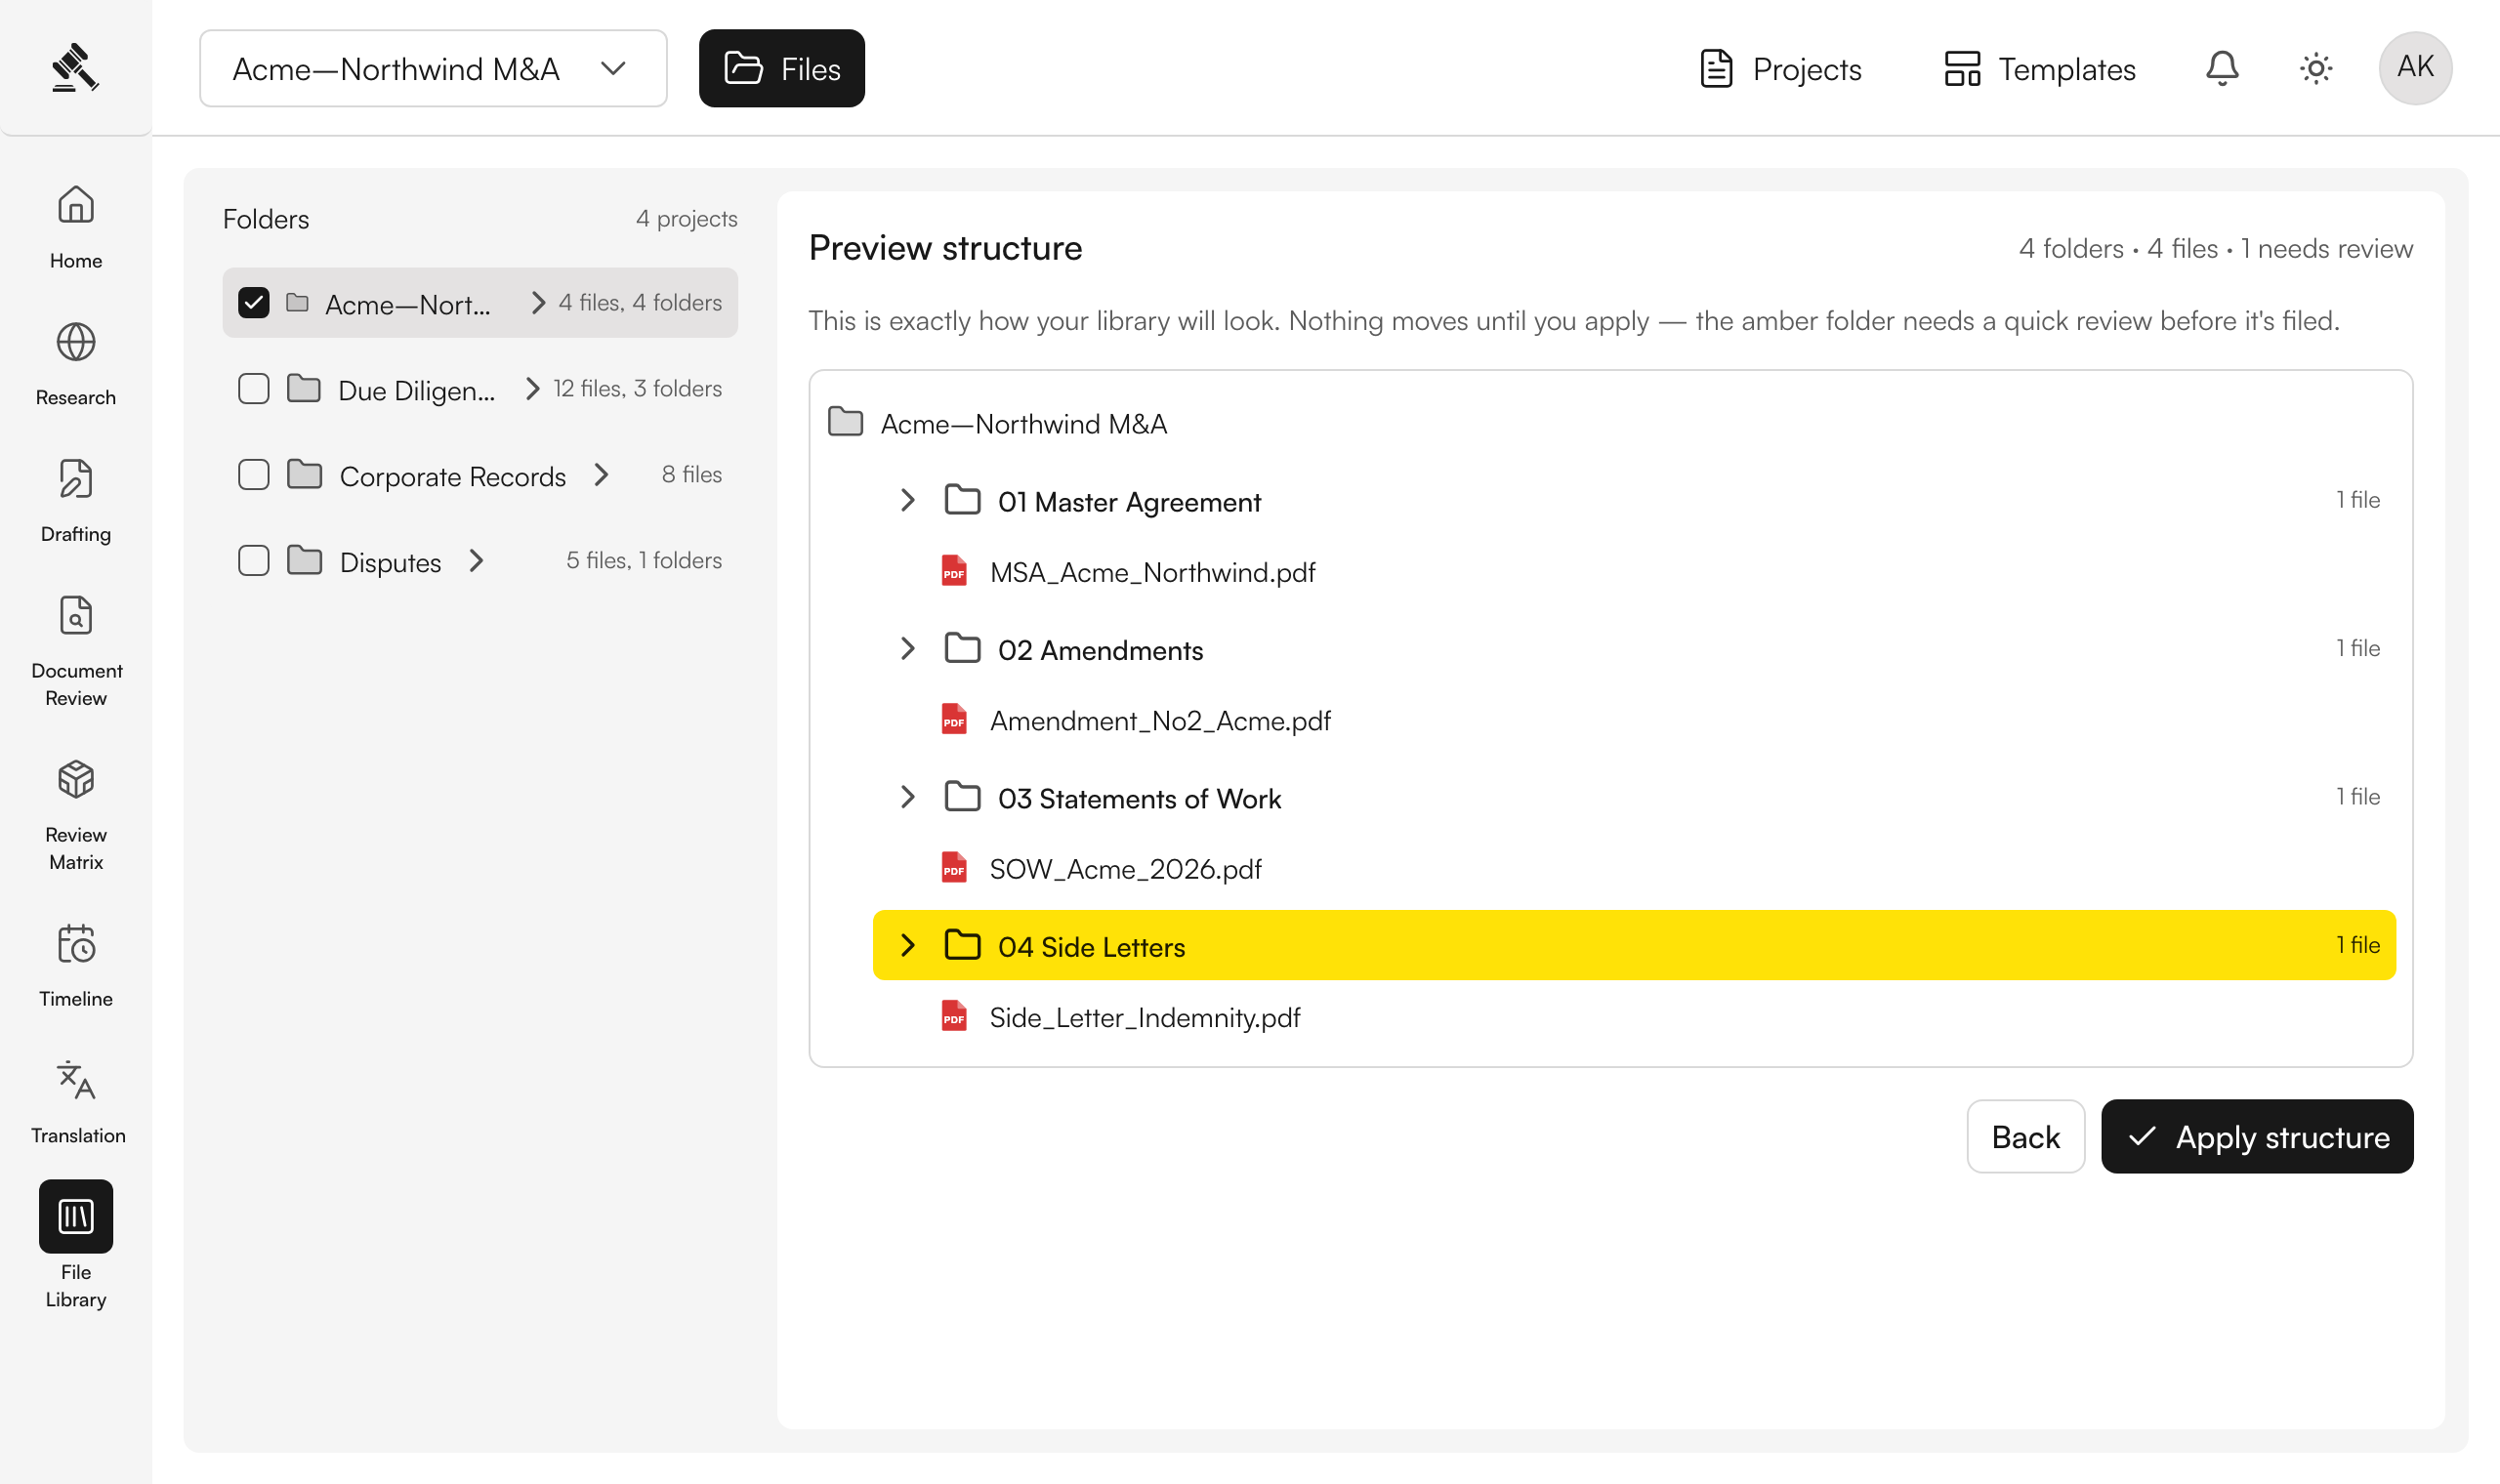
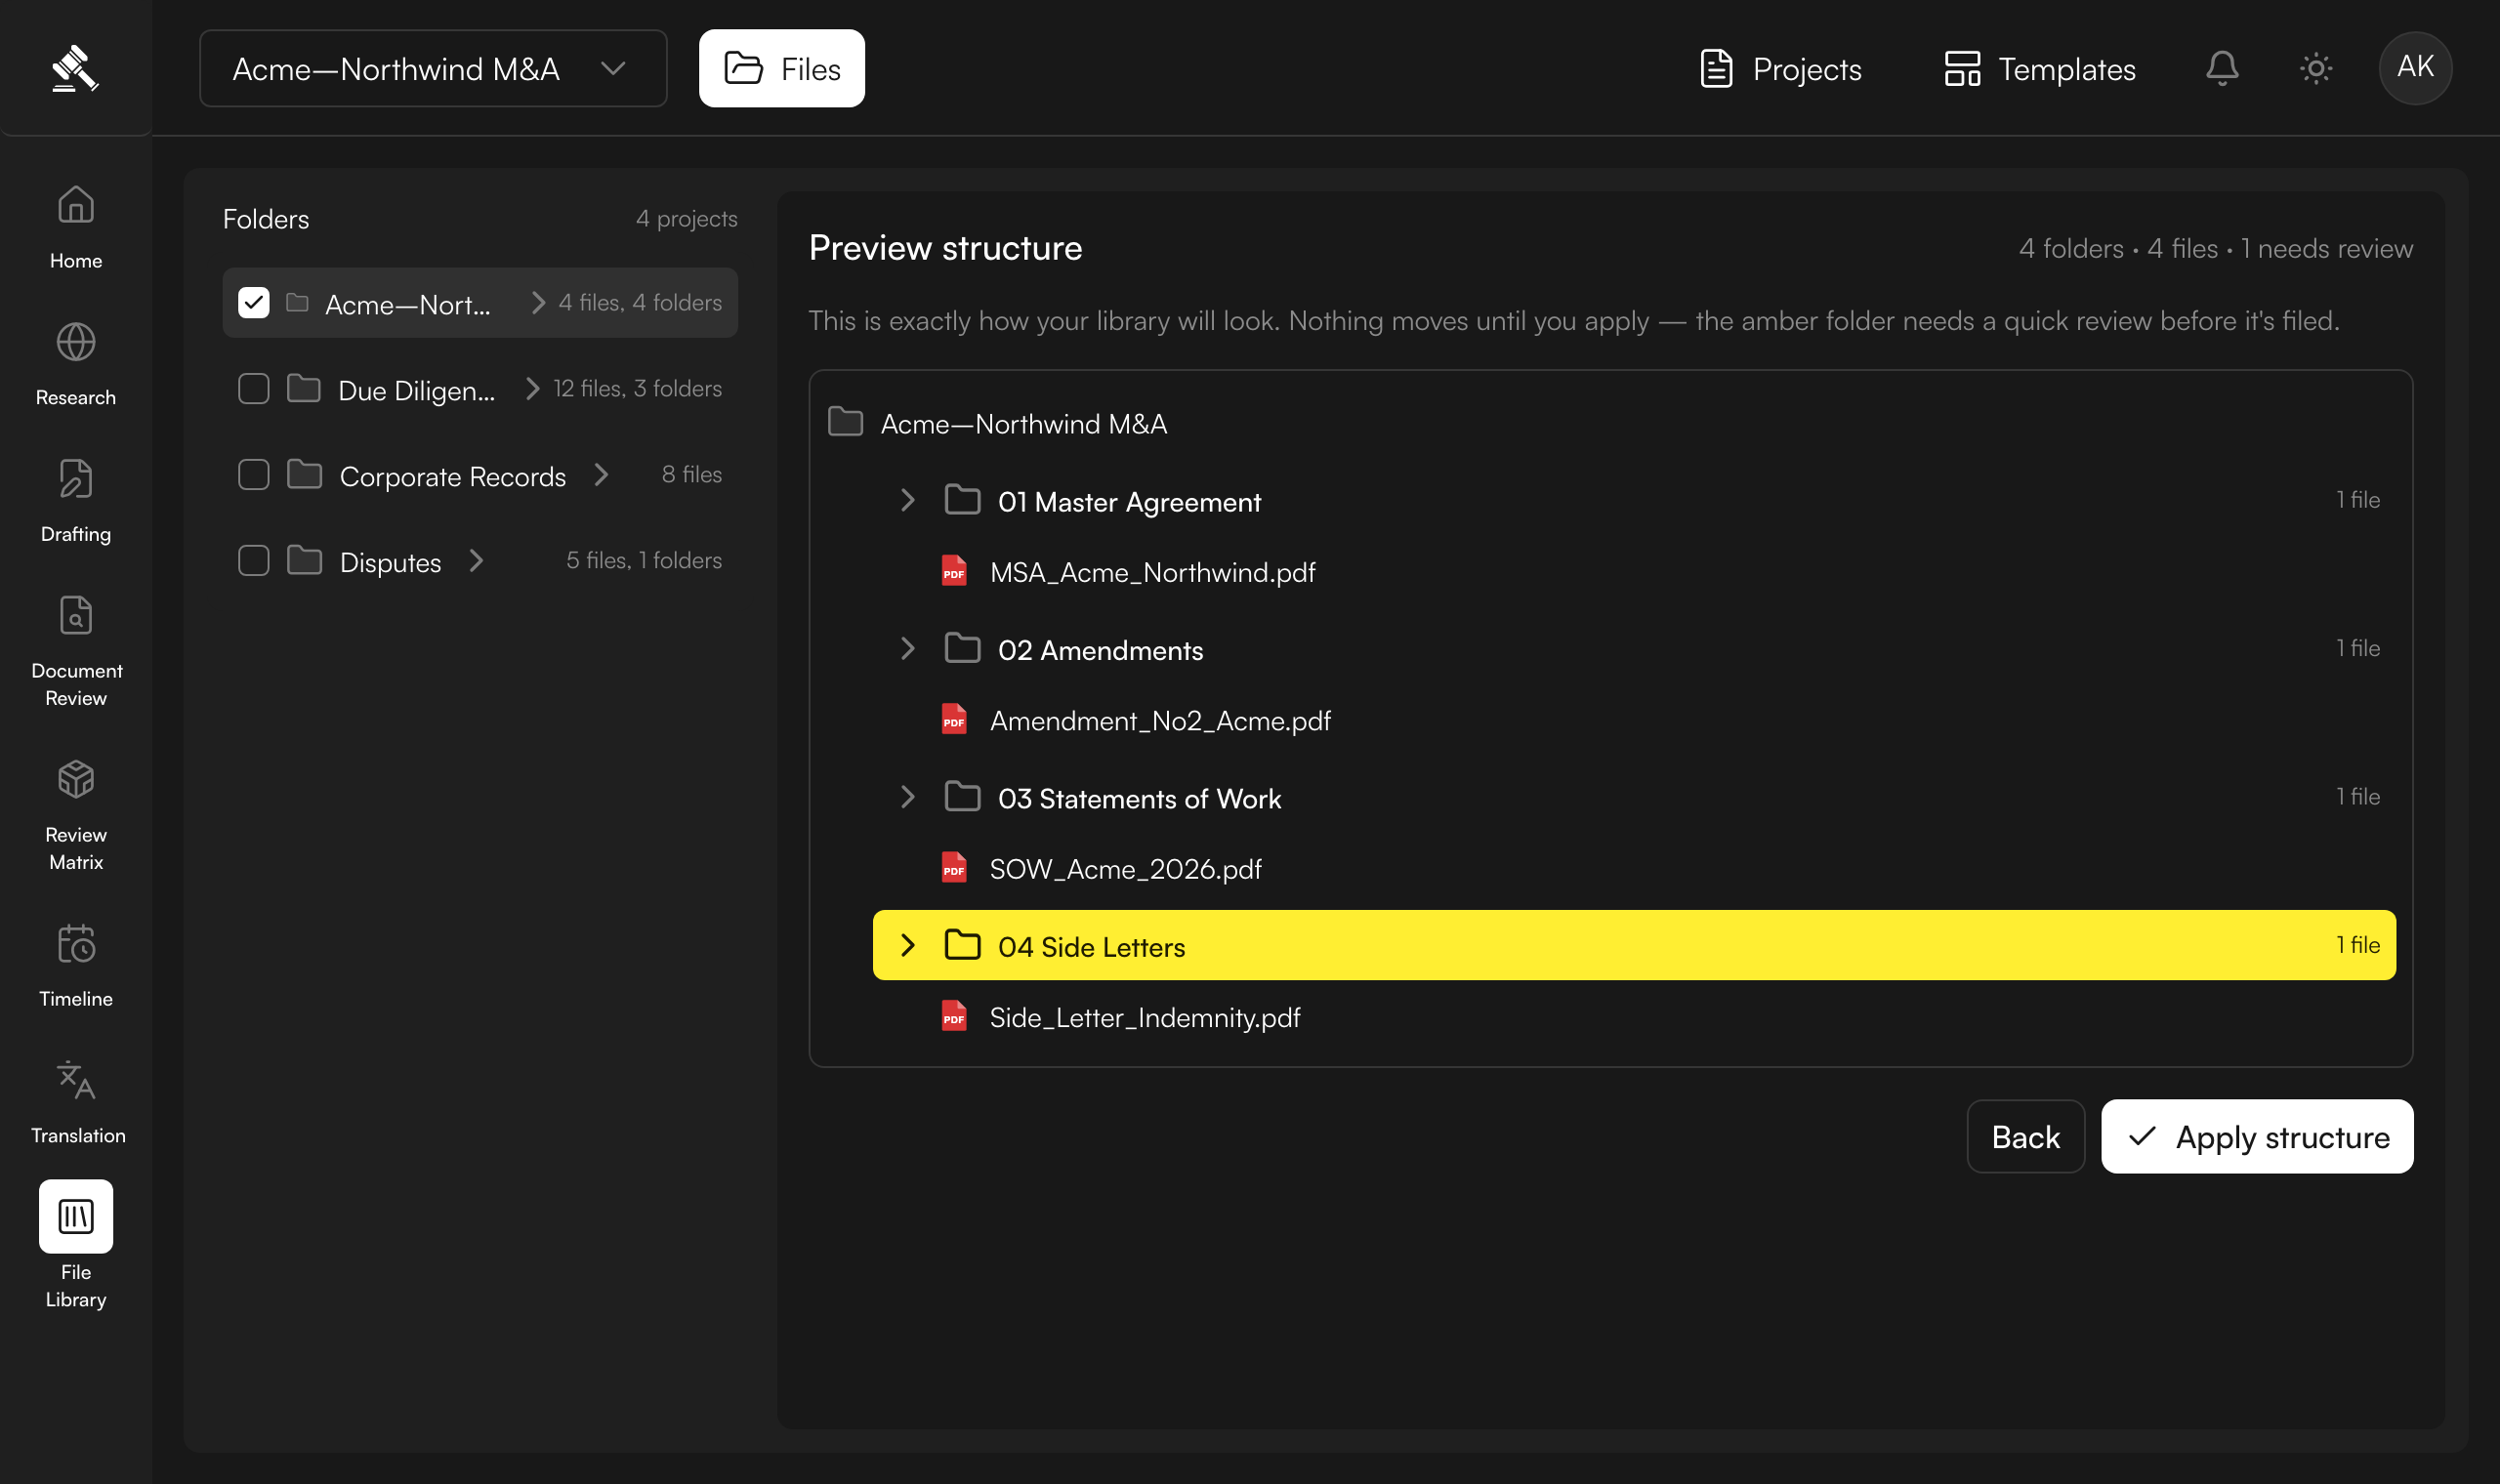
Preview the folder tree before anything moves
You get an exact preview of the proposed library — every folder and which files land where — before anything is moved. Folders that need a human decision are flagged in amber. Review it, then click Apply structure to commit, or go Back to switch strategy.
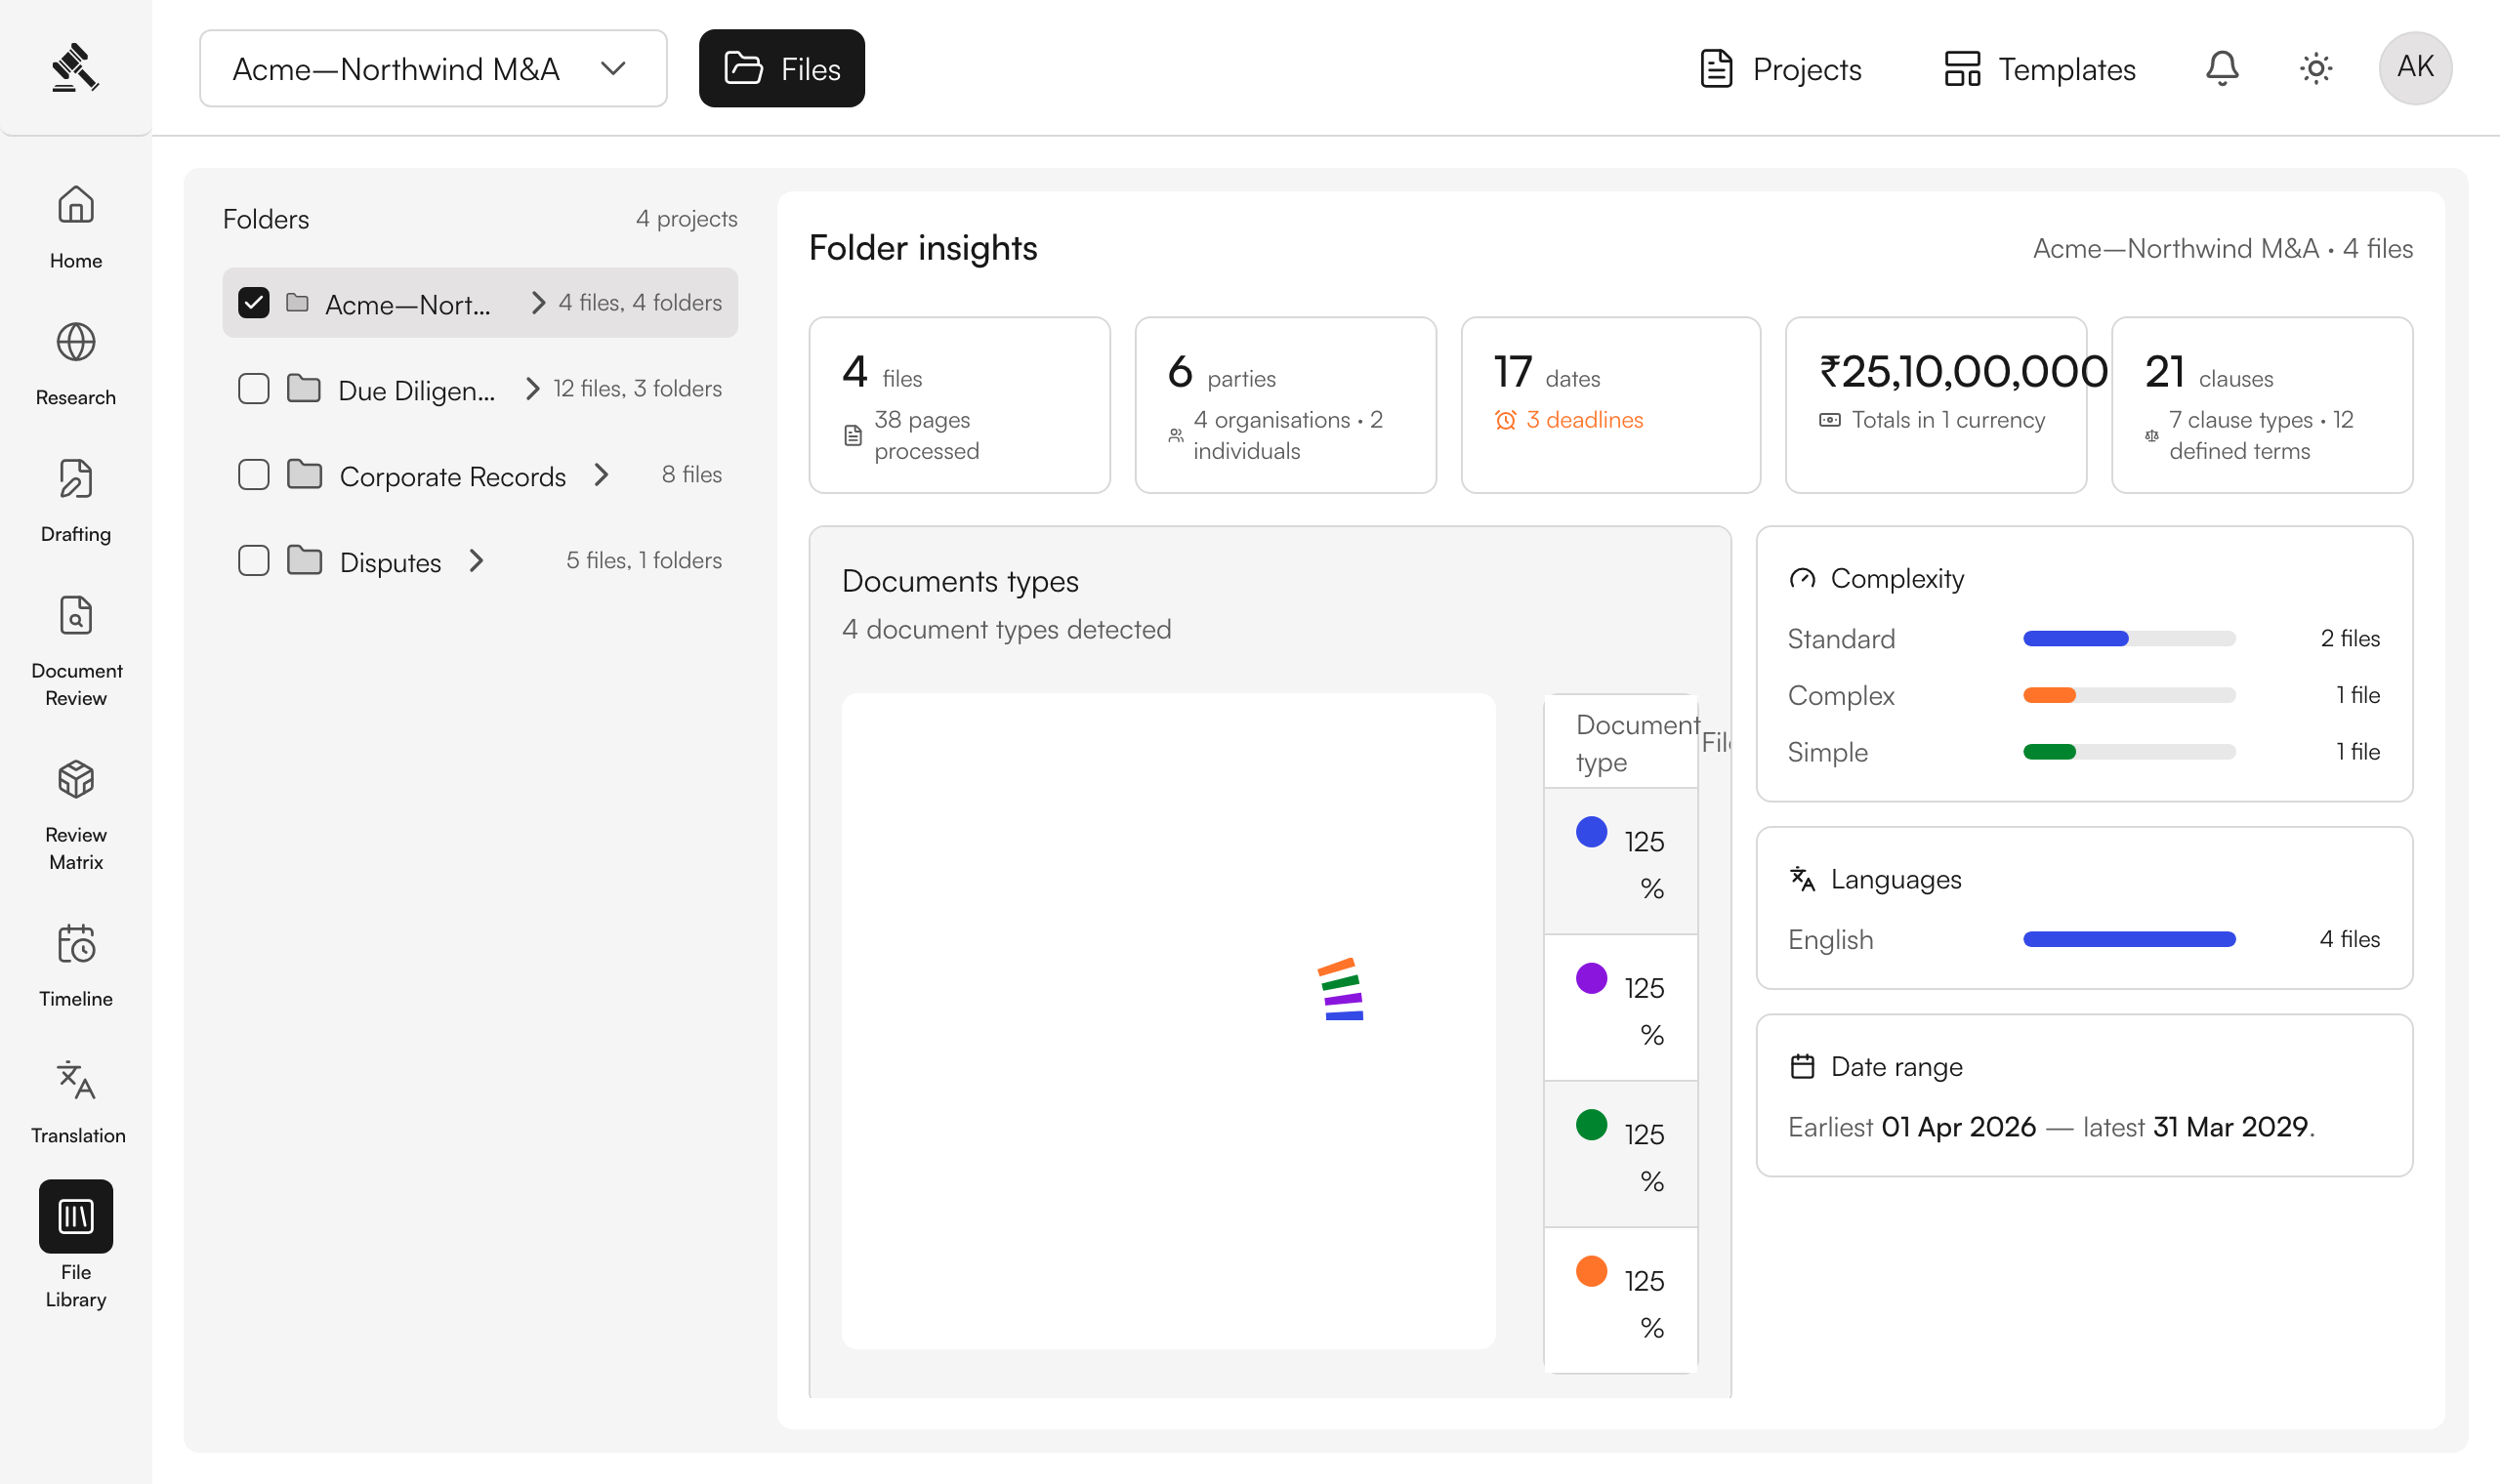
See folder insights at a glance
Open the Insights tab on a folder to see the whole corpus rolled up: files and pages, unique parties (organisations vs individuals), dates and deadlines, total ₹ amounts, and clauses — plus a document-types breakdown, complexity and language distributions, and the overall date range. It's a one-screen read on a data room you've never opened.
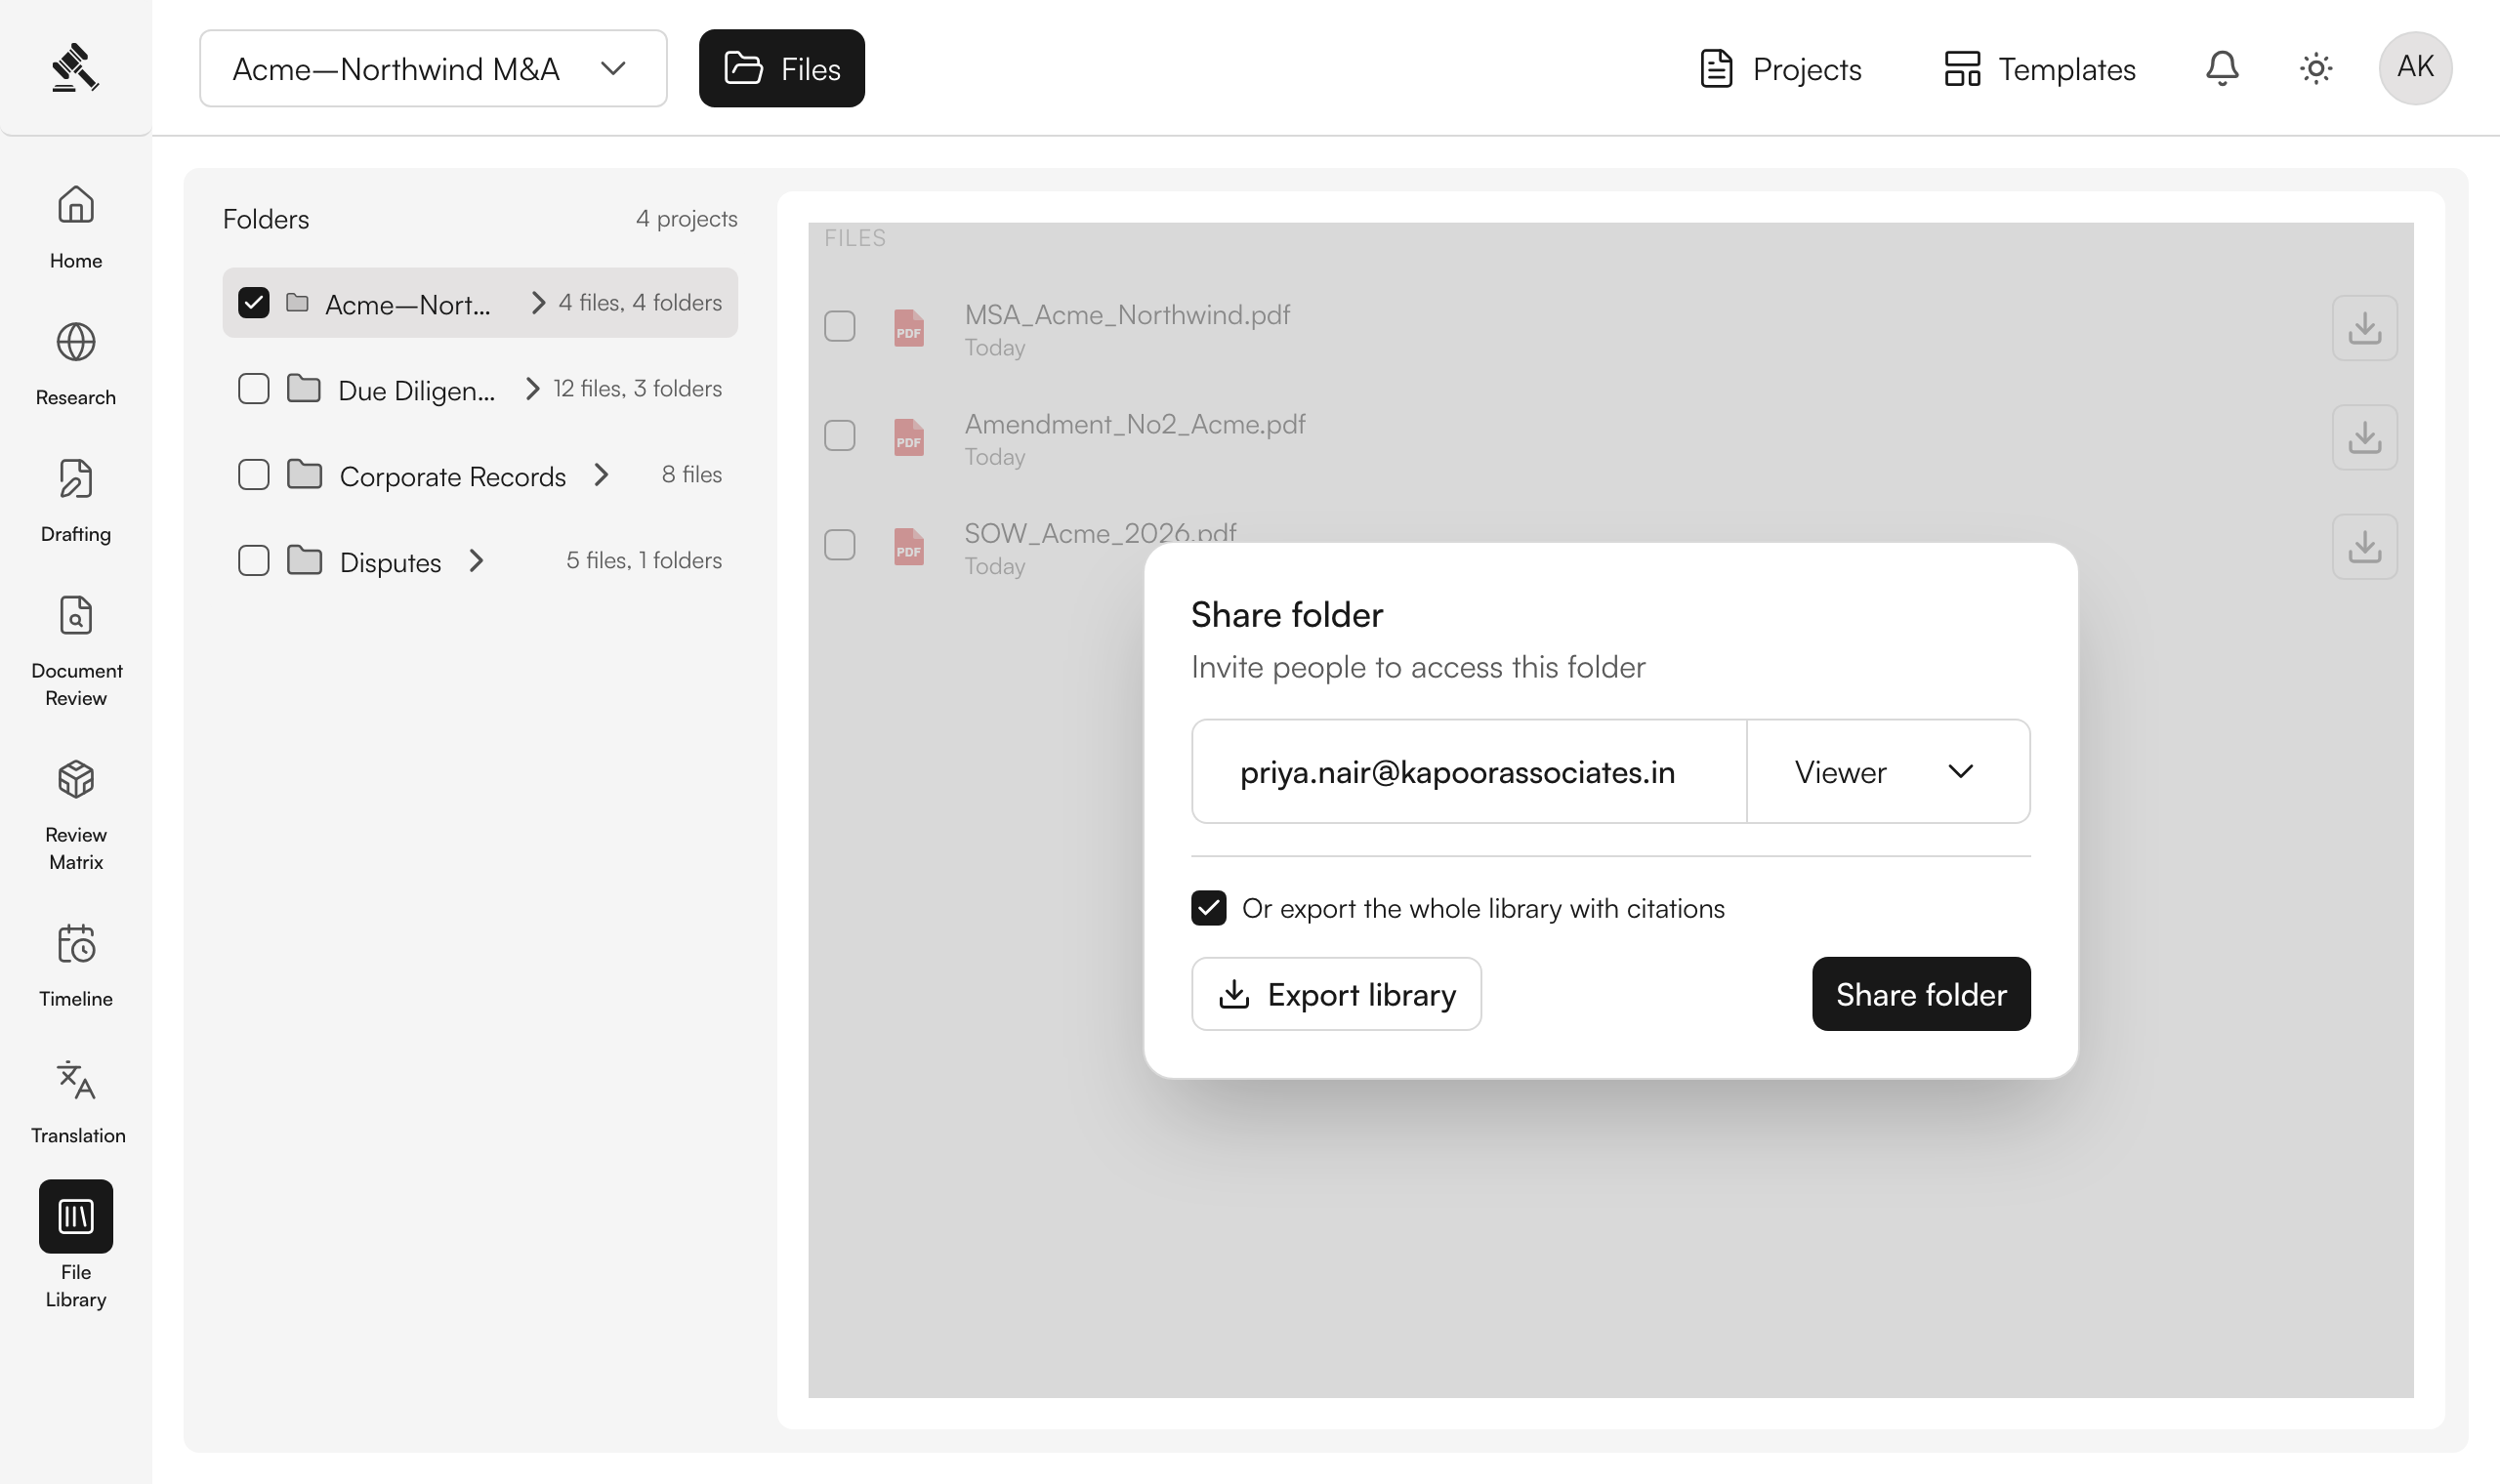
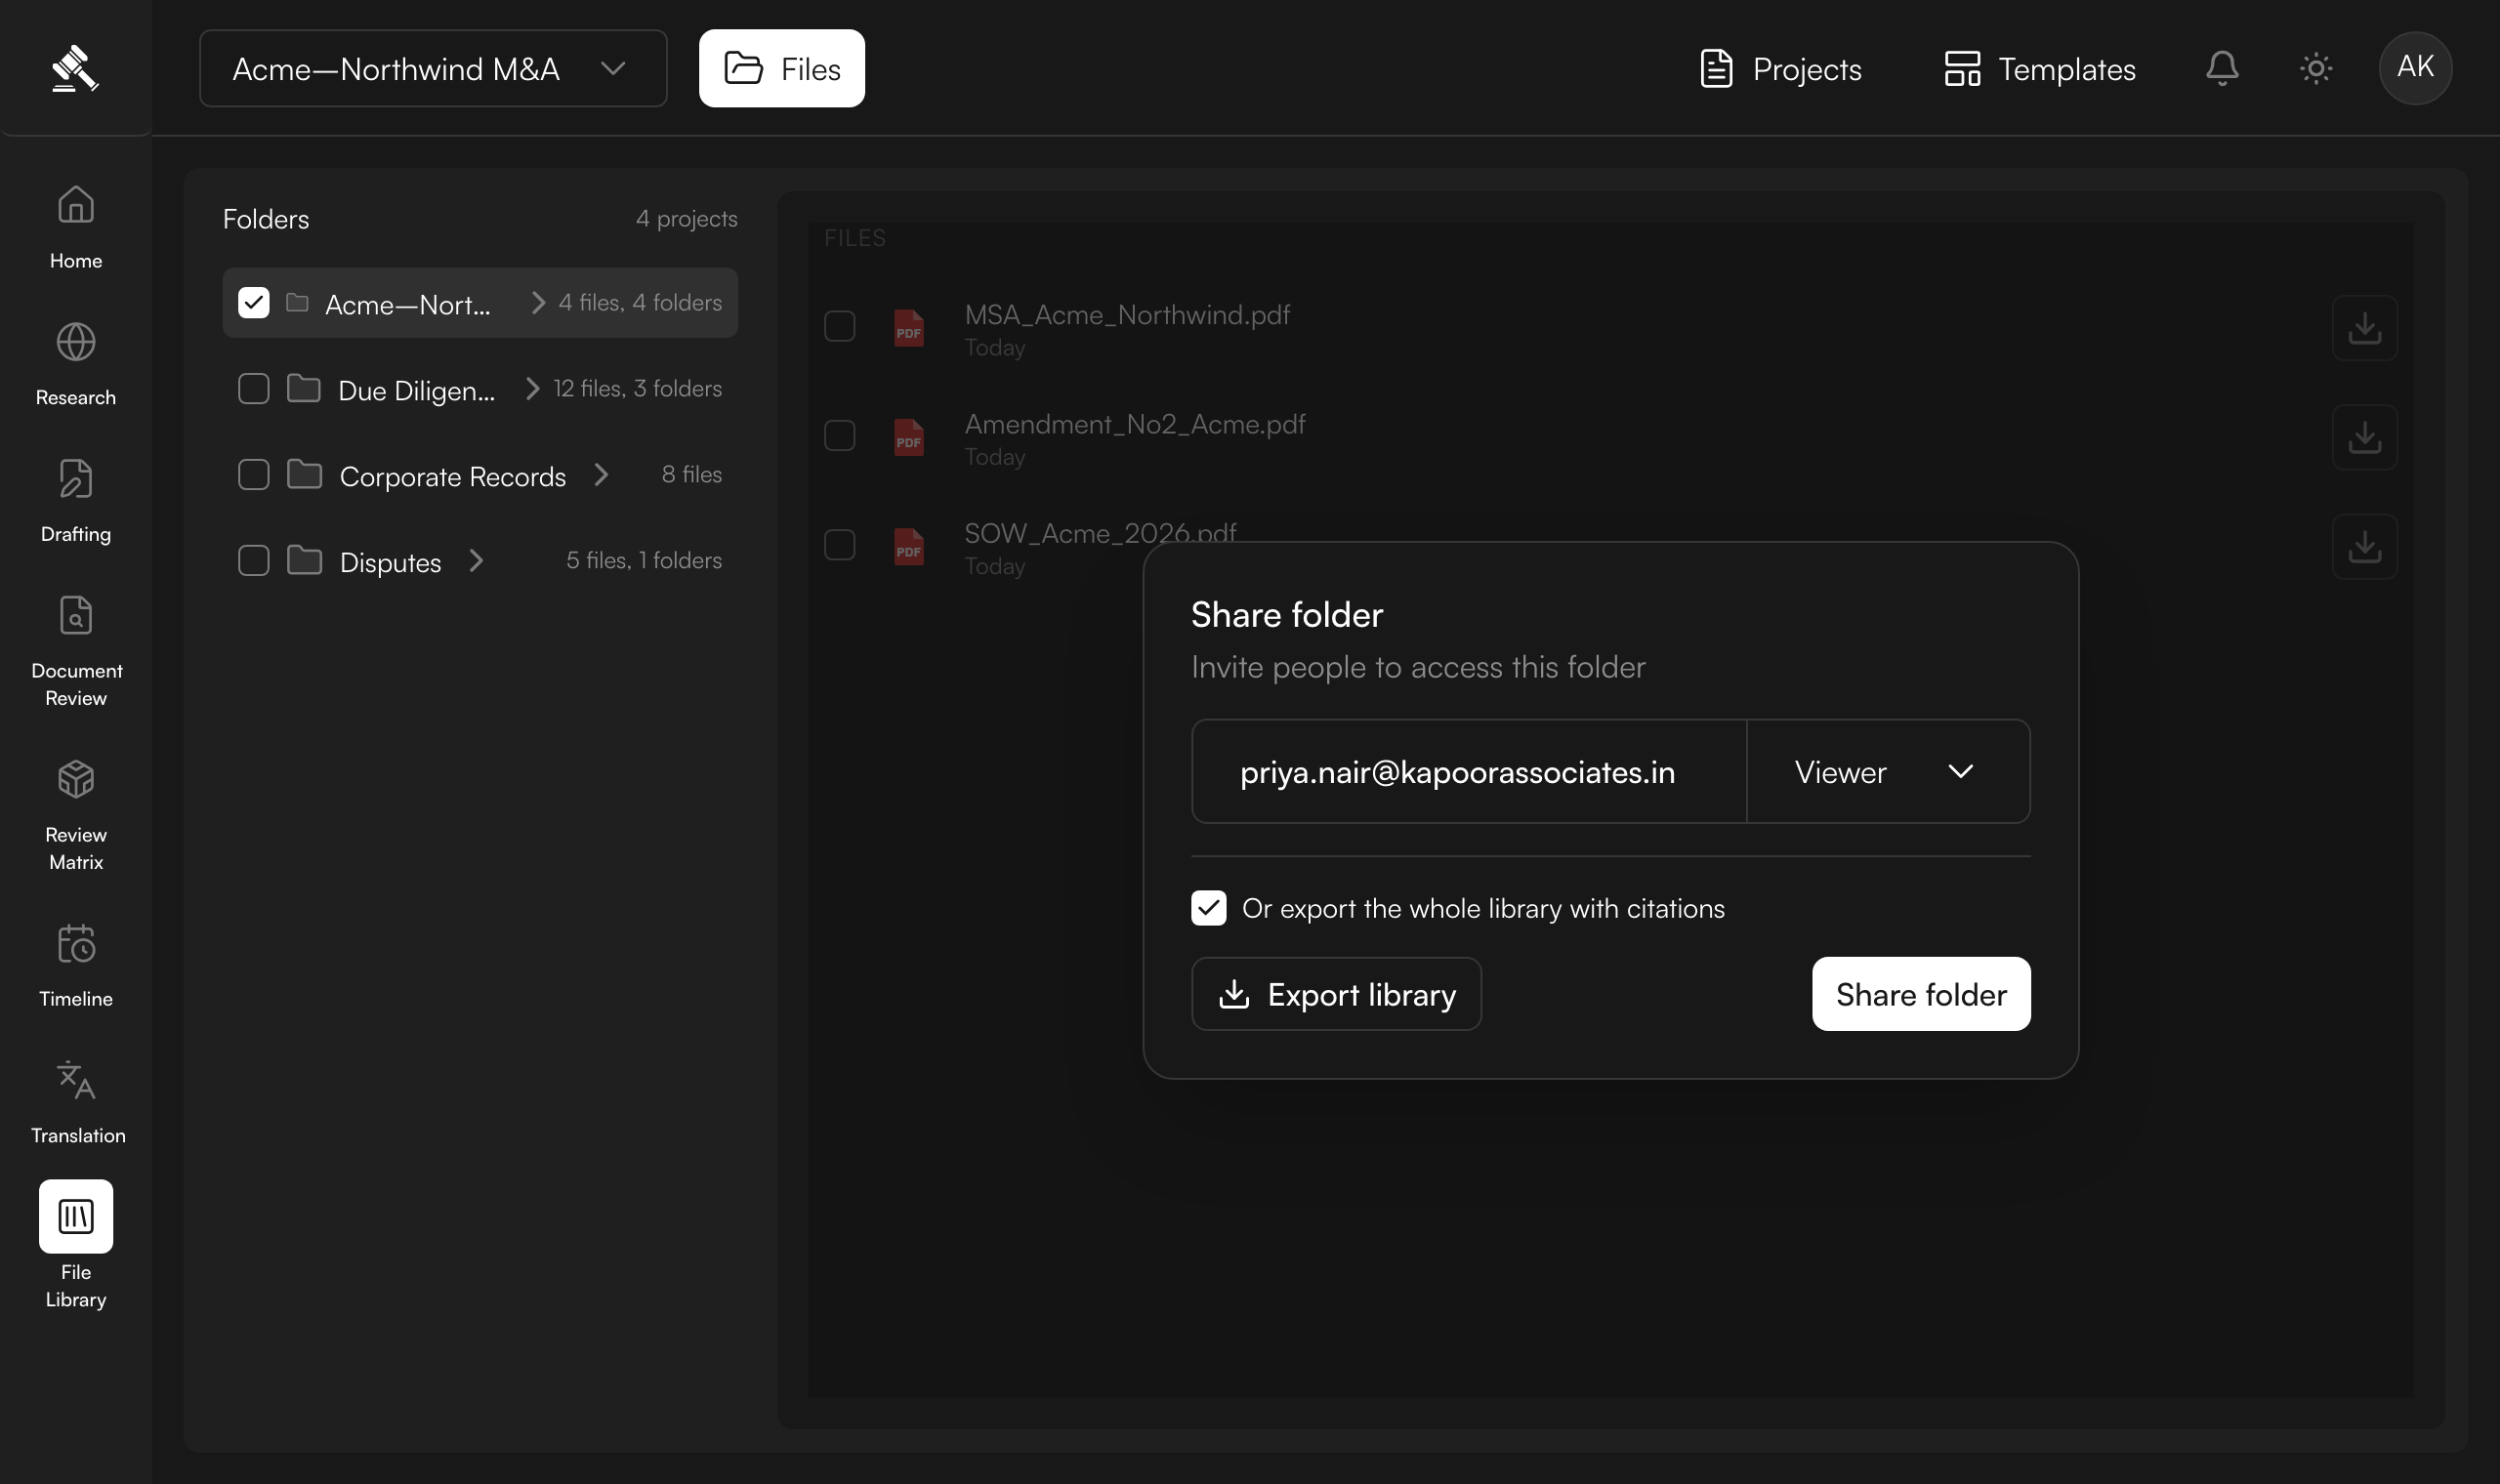
Share a folder — or export the library
Share any folder with a teammate by email and pick their role — Viewer, Editor or Owner — with granular per-folder permissions. Or export the whole library, with citations included so every extracted fact stays verifiable. See Sharing Files.
Next steps
Once your files are uploaded and processed, you can:
- Organize them into folders manually or with Smart Folders.
- View file details to see the AI summary and extracted entities.
- Search across your library to find specific documents or content.
- Share documents with team members and external parties.